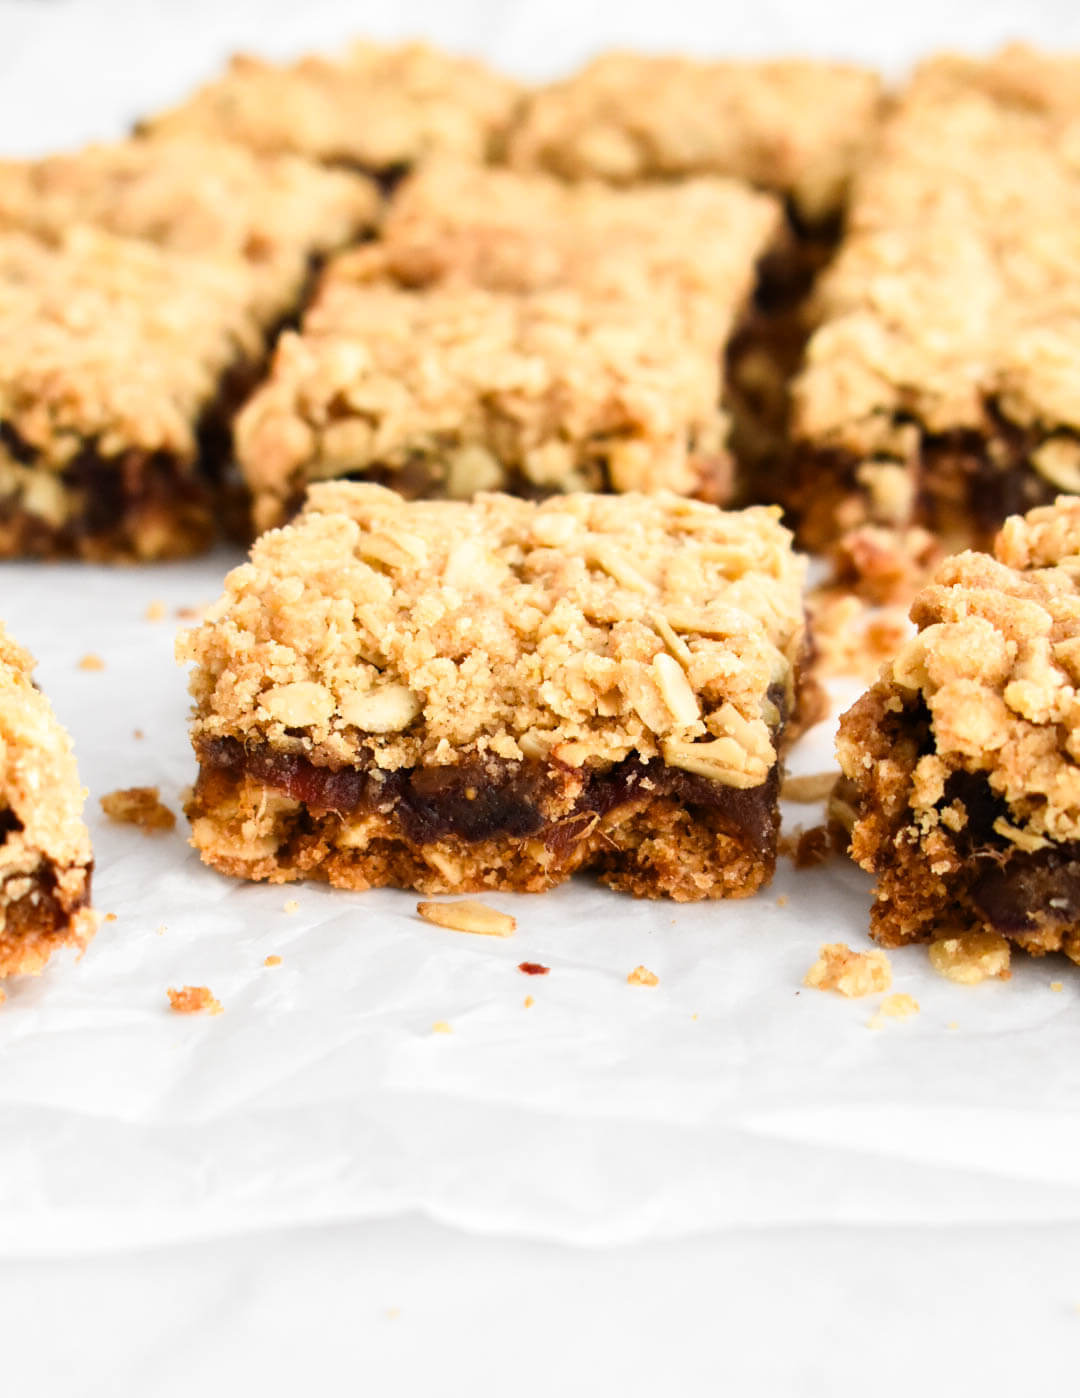
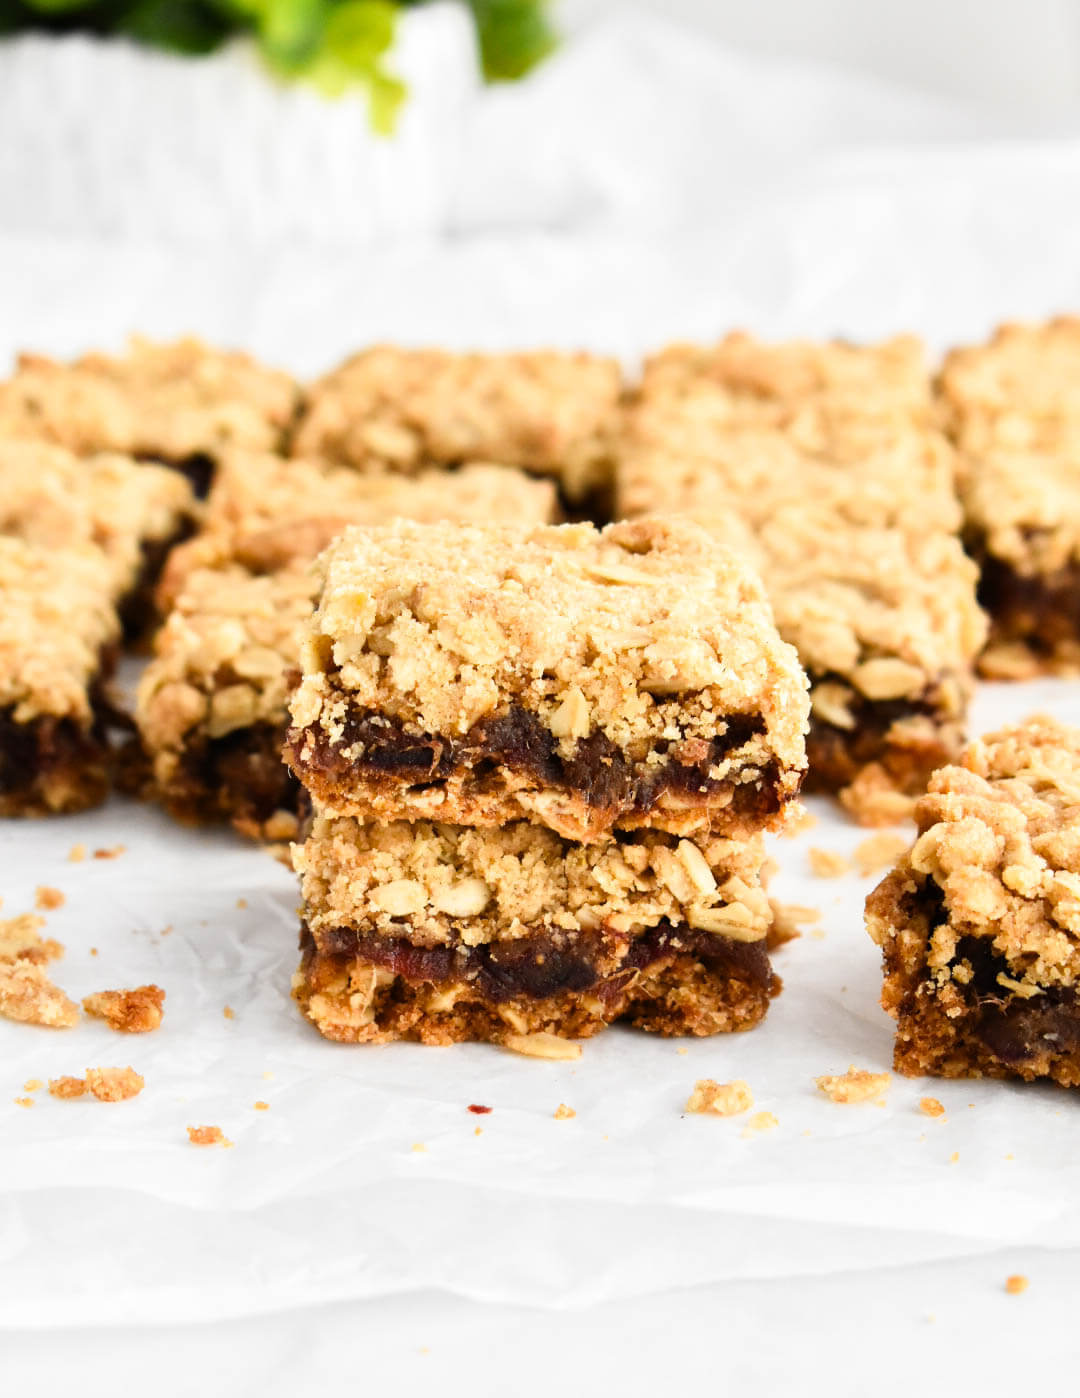
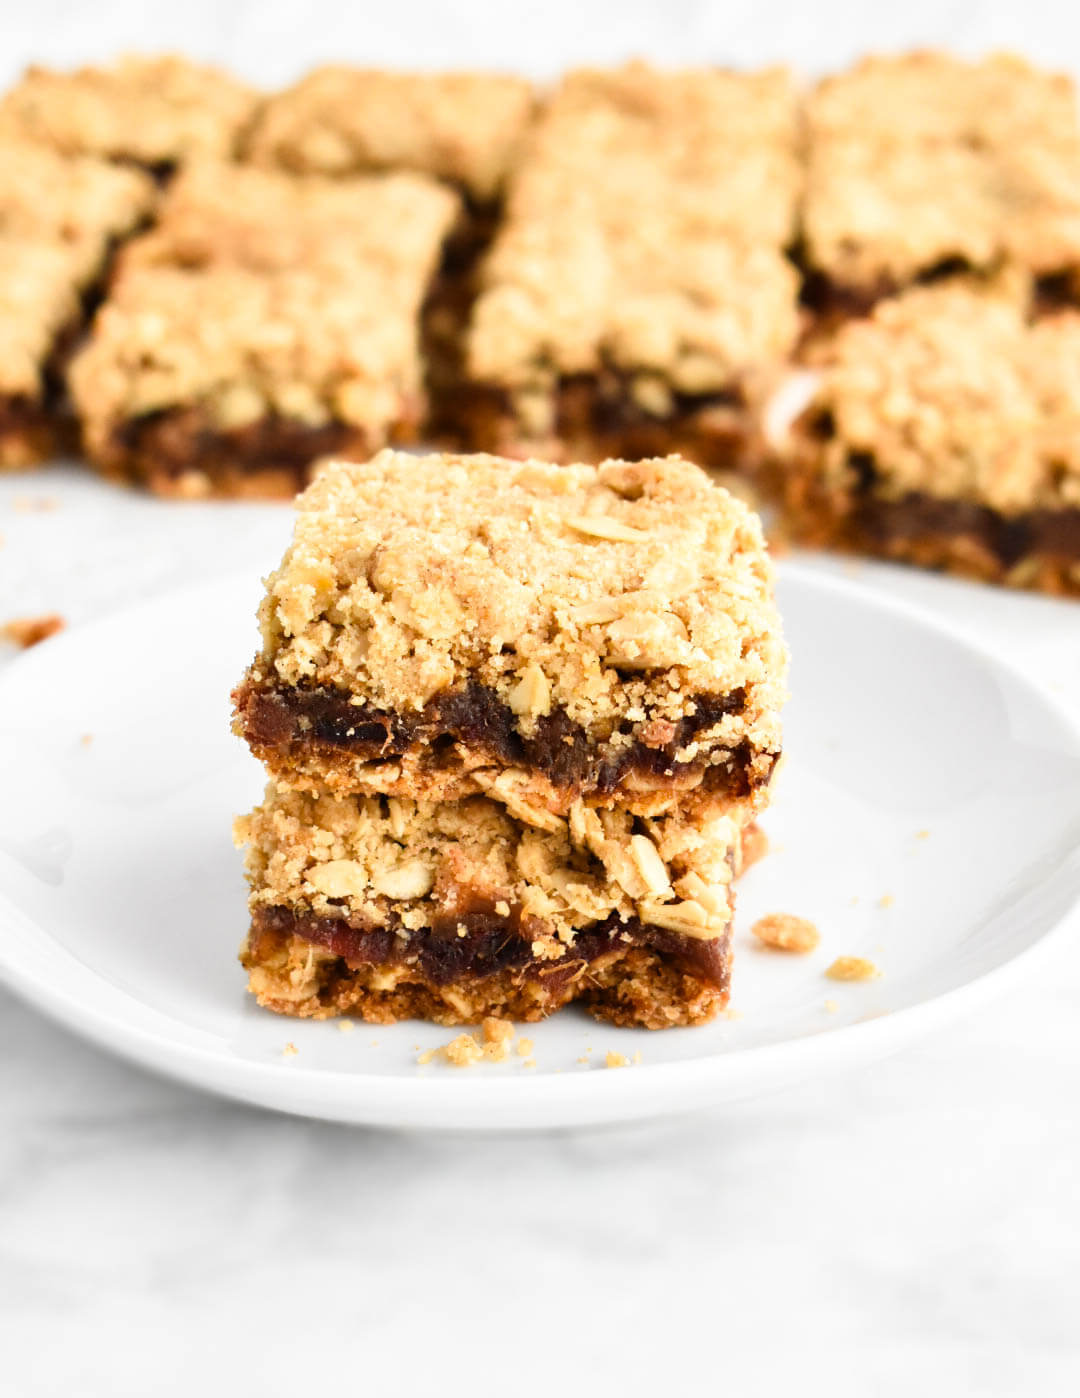
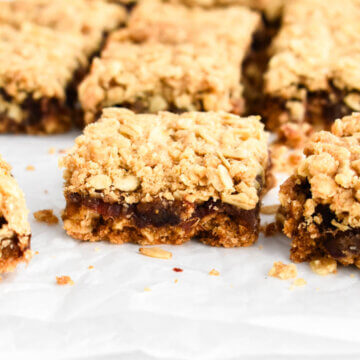
With their buttery oat crust and a deliciously gooey date filling, these Date Squares are an irresistible treat you will want to enjoy over and over again.
Old fashioned Date Squares have been a popular Canadian treat for a hundred years – and for good reason. Sometimes referred to as Matrimonial Cake or Date Crumble, depending on the region of Canada, these delicious little treats are a delight to eat. They are perfectly sweet, with a buttery crumbly crust and a gooey date filling. It’s no wonder they’re popularity has spread beyond the border.
These delicious little date filled squares have been a favorite of mine since childhood. While I would never turn down a bakery version, there is nothing like this homemade date square recipe. I have been making this recipe for decades and it is hands down my favorite.
These date bars have a super buttery, crumbly oatmeal crust that compliments the gooey date filling.
I make my filling without adding any extra sugar since dates provide plenty of sweetness on their own. This helps keep these oatmeal date bars perfectly sweetened (and not overly so). Since they are loaded with dates and oats, you also get a good serving of fiber. Not bad for a dessert recipe.
These date squares are loved by all – young and old. I especially love enjoying these date squares alongside a cup of coffee or tea.

Why we love this recipe
- Date squares are delicious! Buttery, gooey, and perfectly sweet.
- This old fashioned recipe is loved by all – young and old.
- You can make this treat gluten free by using a gluten free flour substitute.
- It is an easy dessert to make. You don’t need a stand mixer for this recipe and the steps are easy to do. The hardest part is waiting for the bars to cool before cutting them!
- While it is a dessert (and has plenty of butter and sugar), it includes lots of healthier components like dates and oats.
Ingredients in Date Squares
- Dates: Pitted medjool dates. The dates are chopped to help them break down during cooking for a smoother filling.
- Lemon juice: Freshly squeezed lemon juice is used in the date filling.
- Rolled oats: Used for the crust.
- Flour: All purpose flour is mixed with the rolled oats to form the base of the crust. If you wish to make these date squares gluten free, use a gluten free all purpose flour substitute.
- Brown sugar: Used to sweeten the date squares. Brown sugar is used in the crust mixture. I do not add any to the filling as the dates provide enough sweetness.
- Baking soda: Leavener used in the crust.
- Cinnamon and salt: Added to the crust for flavor.
- Butter: Softened butter is added to the crust.
**Note: Ingredient quantities and full instructions are in the recipe card at the end of this post.**
How to make Date Squares
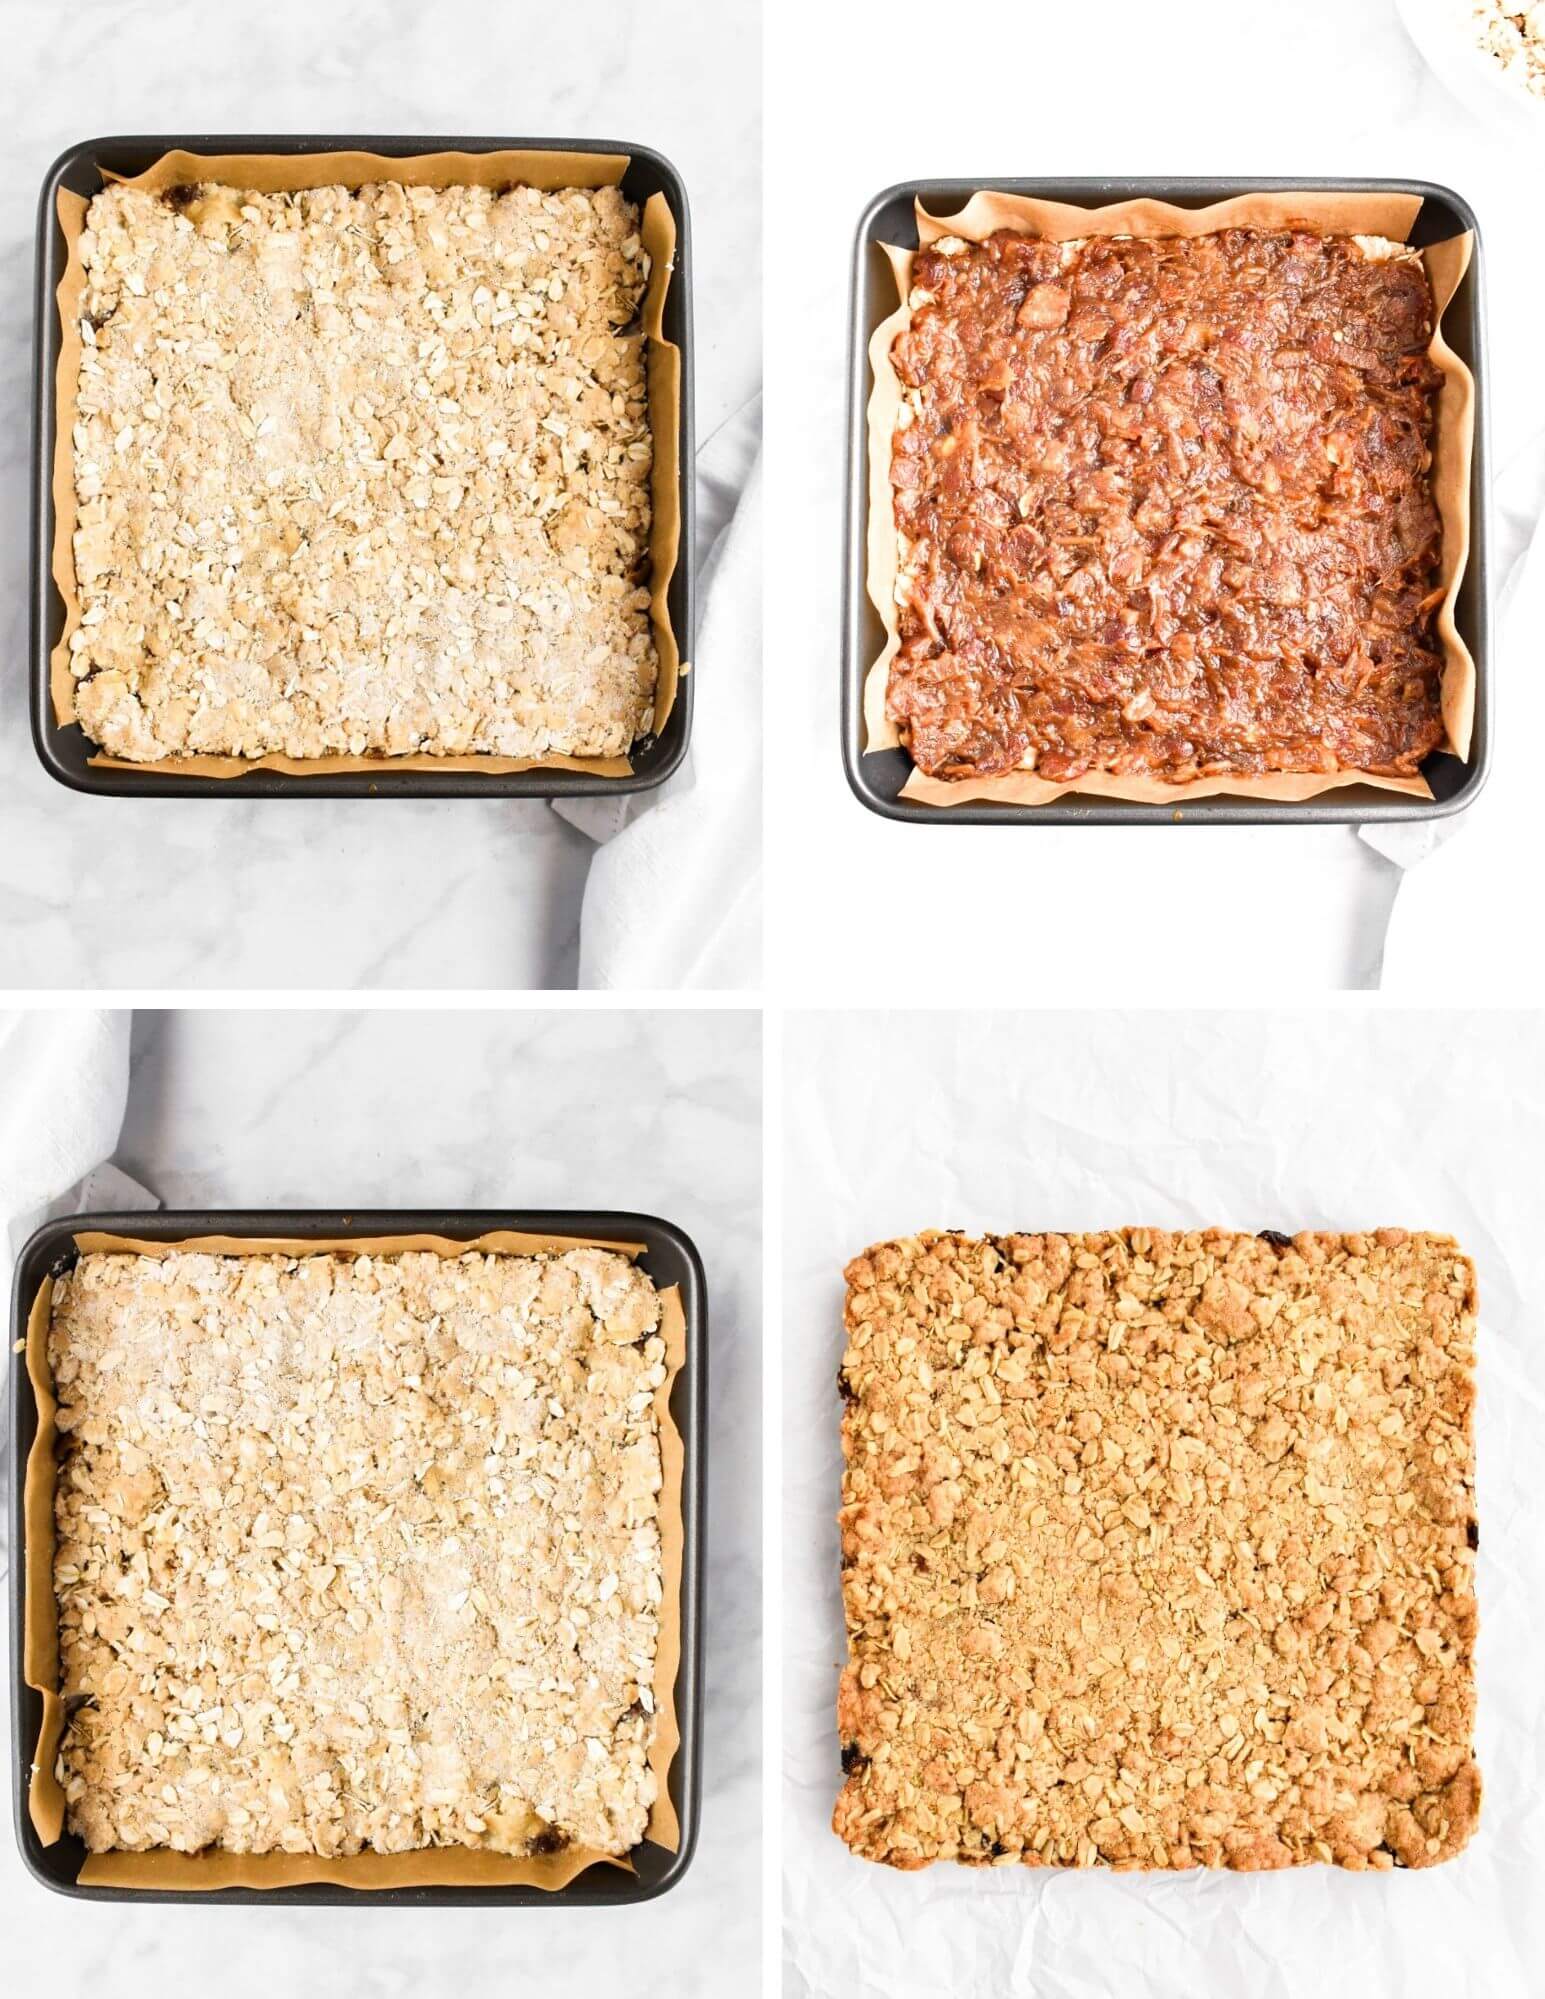
1. Prep. Preheat oven to 350F and line an 8×8 baking pan with parchment paper, allowing some overhang [this will ensure the sides don’t stick and that the bars can easily be removed from the pan for slicing].
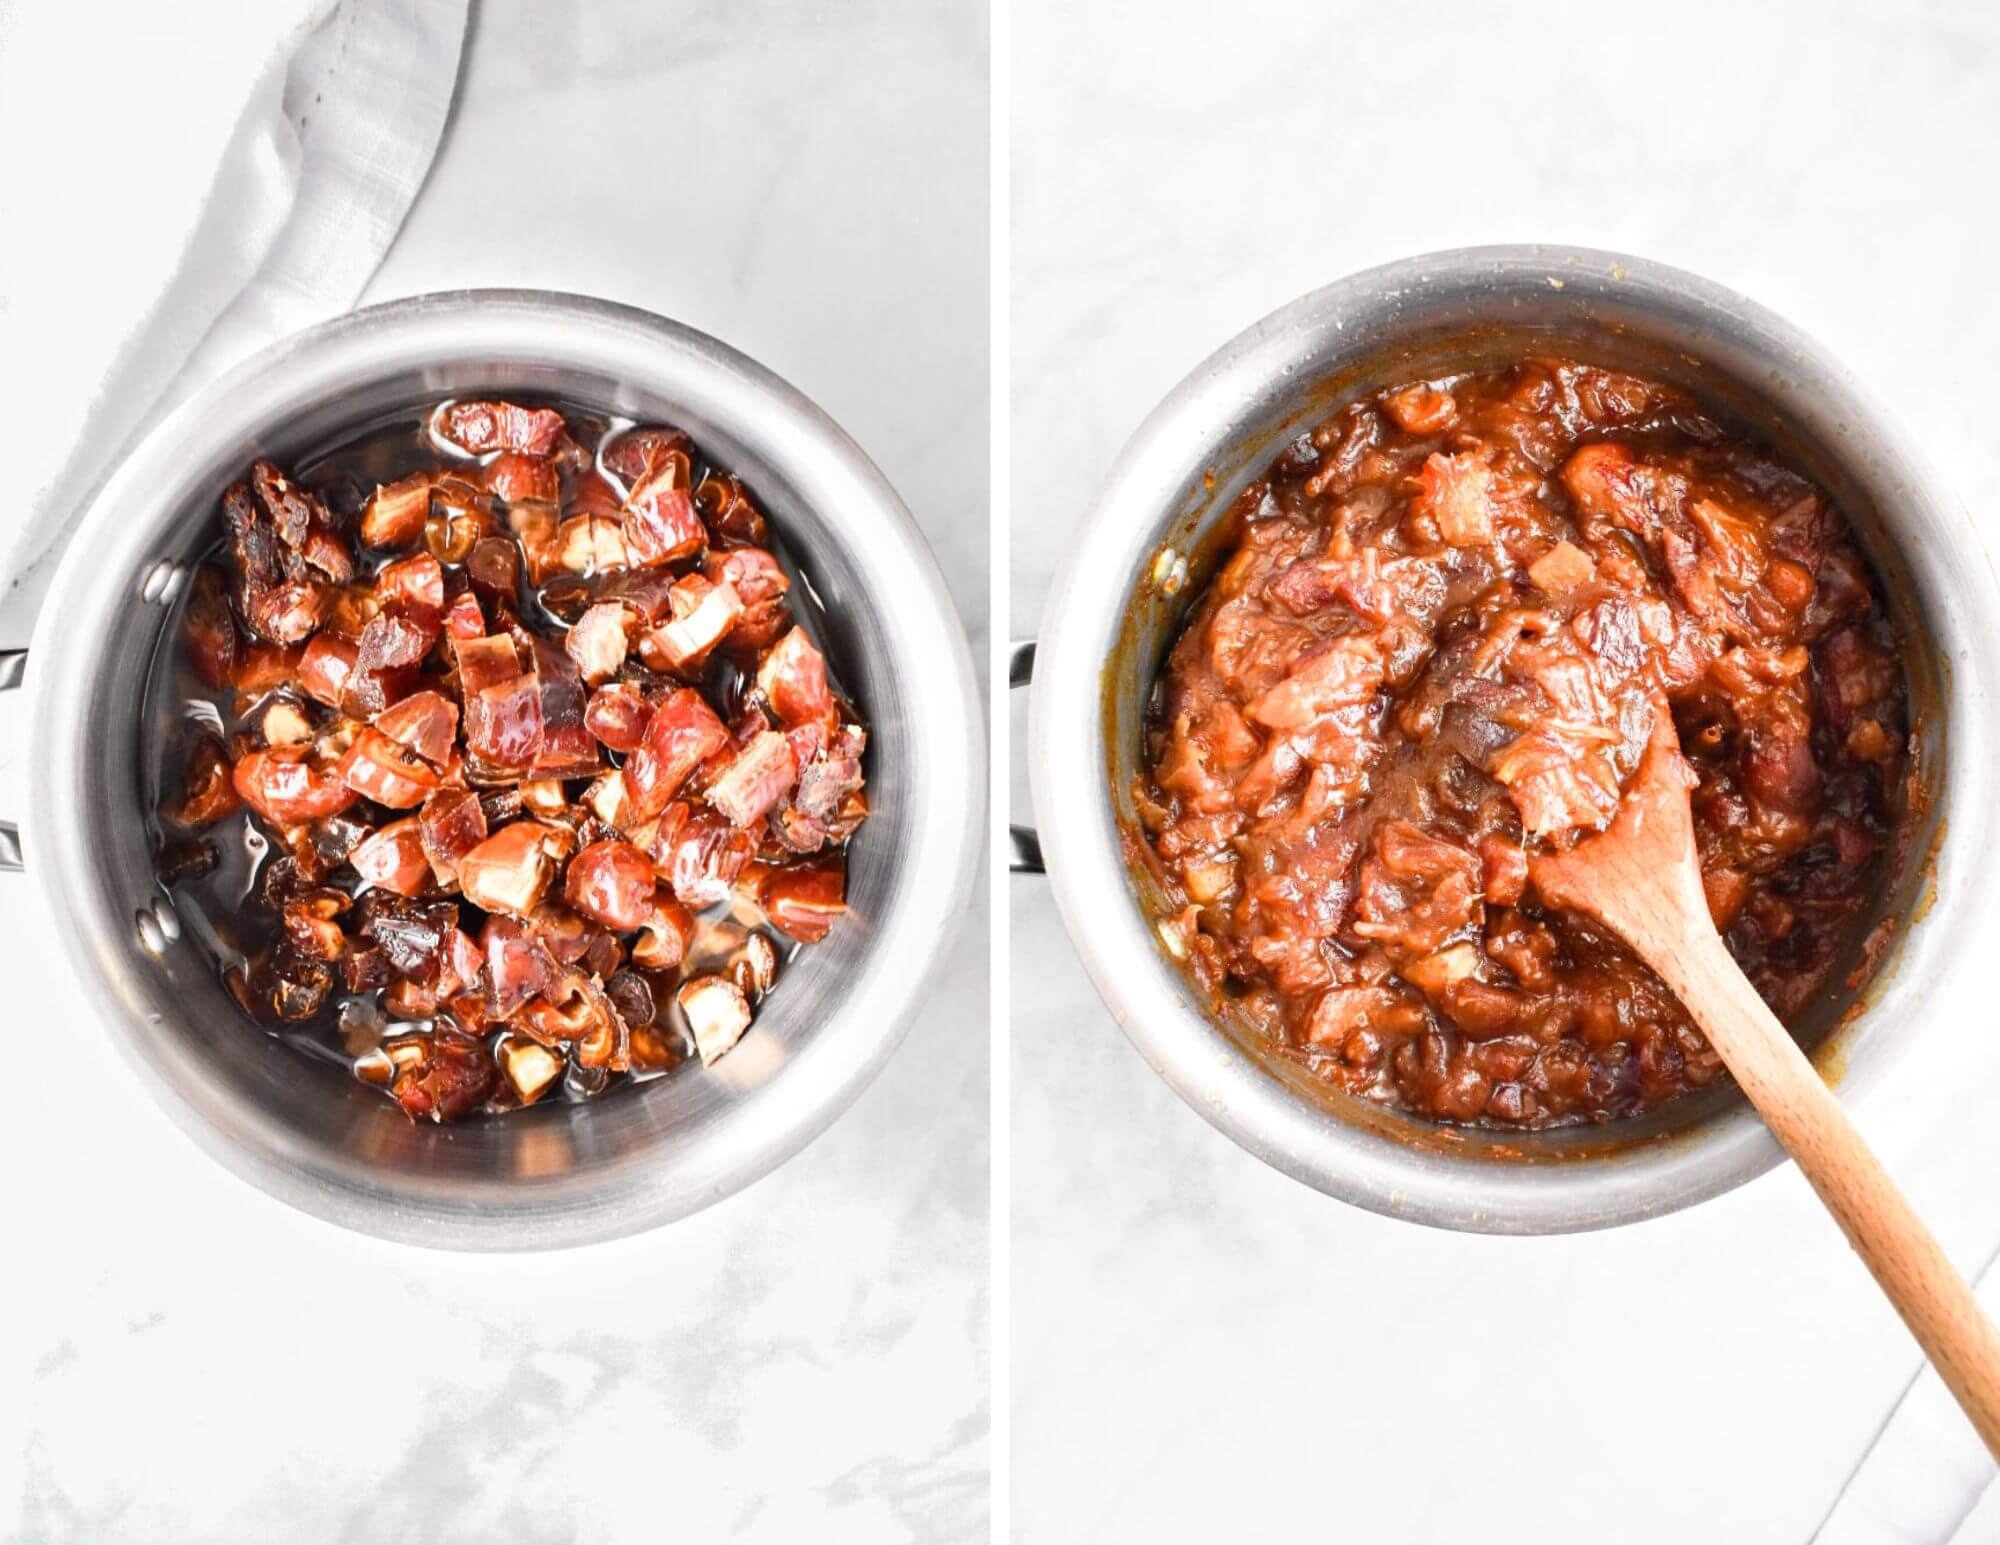
2. Make the filling. Place all of the chopped dates and water in a saucepan and heat over medium heat. Bring the ingredients to a boil, cooking them until the dates break down and create a thickened paste. Remove from heat and let cool while you make the oat crust.
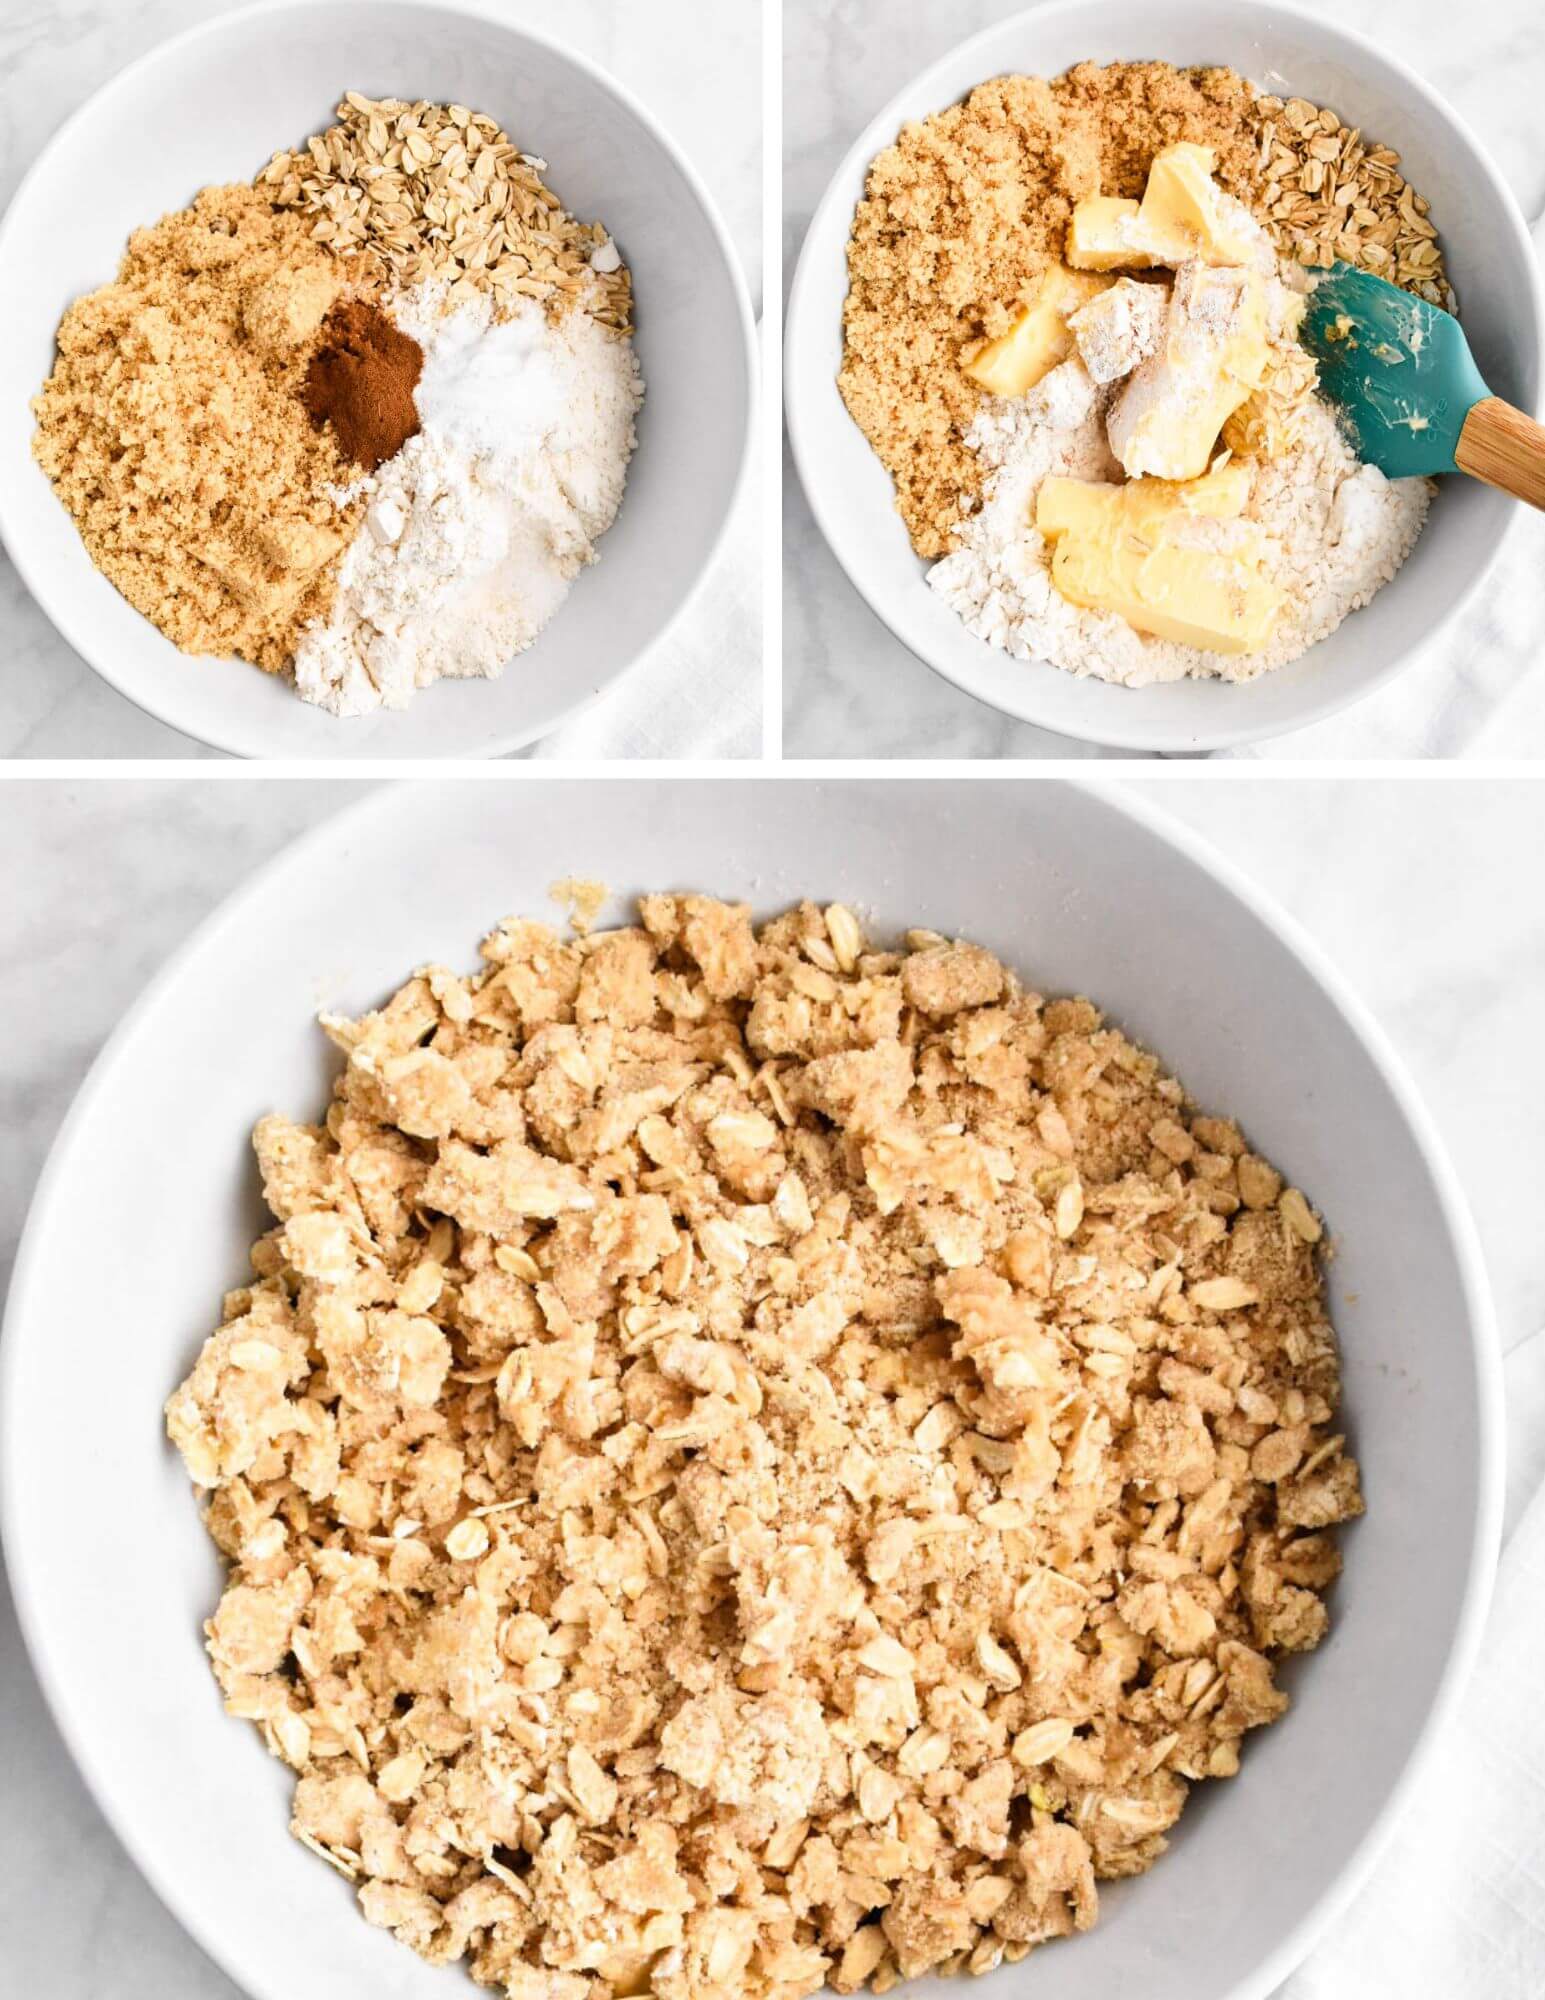
3. Prepare the oat crust. In a large mixing bowl, combine the oats, flour, brown sugar, baking soda, cinnamon and salt. Add the butter to the oat mixture, combining until crumbly. [You can use a pastry cutter or rubber spatula to do this, but if you don’t mind getting a little messy, you can bring this together by rubbing or “pinching” the butter into the dry ingredients by hand to create the crumble.]
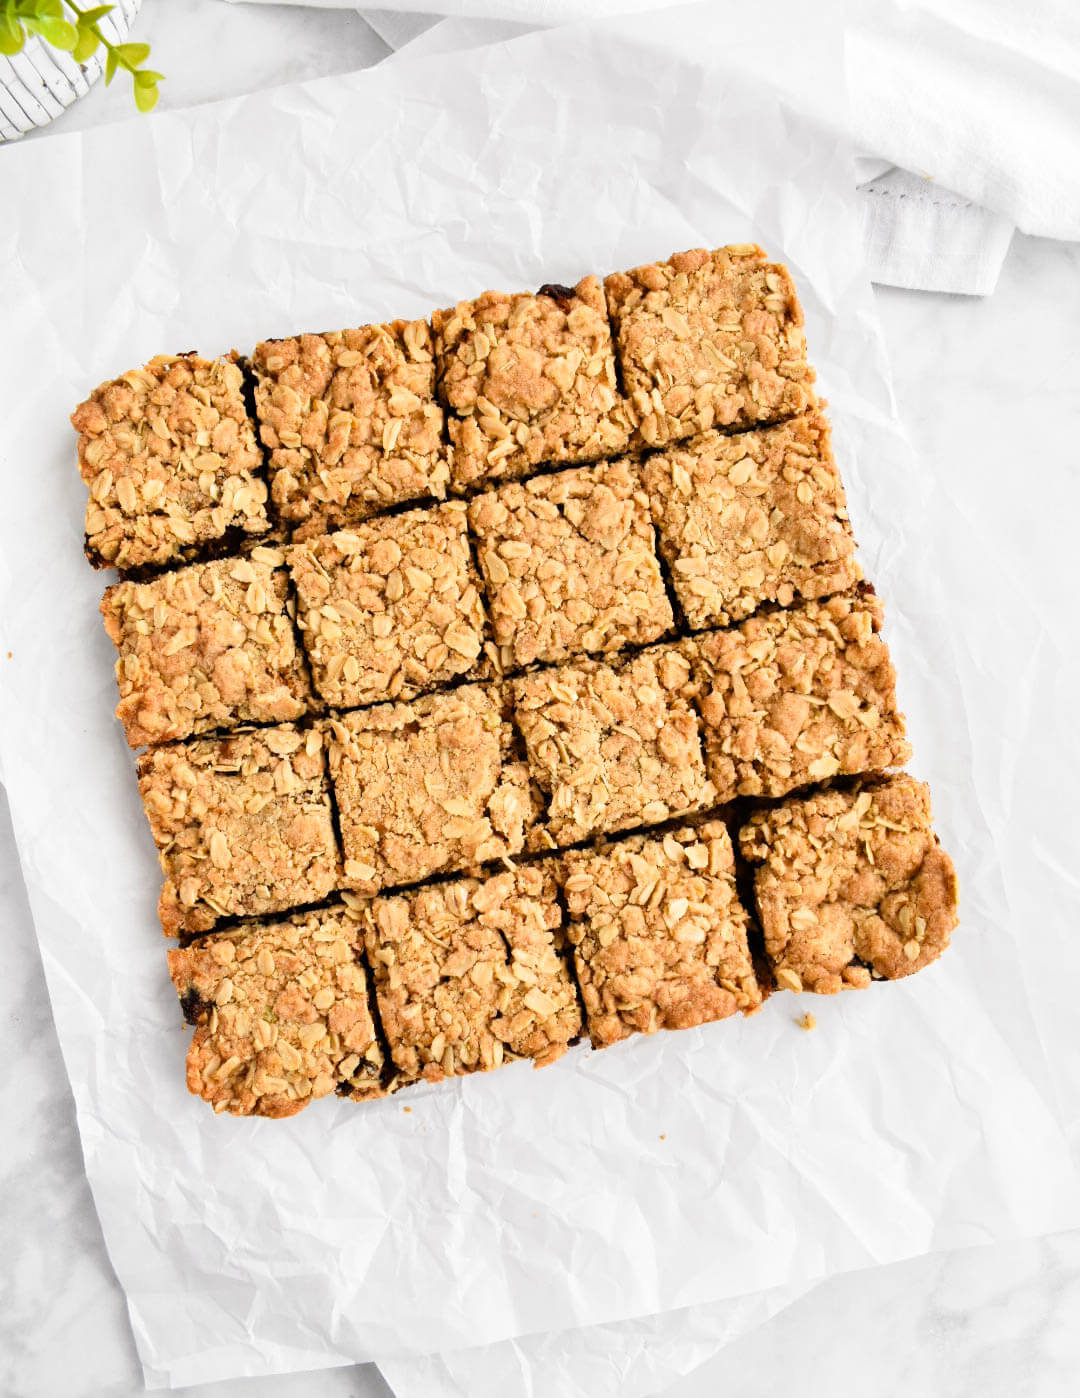
4. Assemble and bake. To assemble the date squares, press half of the oat mixture into the bottom of the baking pan. Top the bottom crust with the thickened date mixture, spreading it in an even layer. Finally, add the remaining crust mixture on top, pressing down lightly. Bake for 30-35 minutes or until the top is lightly browned. Cool in the pan completely before cutting into squares.
Storing date squares
You can place cooled date squares can in an airtight container and store them at room temperature. They can be stored this way for a few days or, alternatively, they can be kept in the fridge for about a week.
Can you freeze date squares?
Yes, you can freeze date squares. Place the cooled squares in a freezer safe container or a freezer bag when freezing to prevent freezer burn. You can place parchment paper between layers to prevent sticking. You can freeze them for up to 3 months.
To thaw the date squares, you can leave them in the refrigerator overnight or thaw them at room temperature.
Looking for more fruit bar recipes? Check out:
Healthy Peach Crumble Bars
Cherry Crumb Bars
Cranberry Bars
Lemon Bars
Apple Pie Bars
Strawberry Oat Breakfast Bars
Did you love this recipe? Please consider leaving us a comment and a 5-star 🌟🌟🌟🌟🌟 rating in the recipe card below.
Don’t forget to keep up with us on Facebook, Instagram, and Pinterest!
Date Squares
Ingredients
Date filling:
- 2 1/4 cups pitted medjool dates chopped
- 1 cup water
- 1 teaspoon lemon juice
Oat crust:
- 1 1/2 cups rolled oats
- 1 1/2 cups all purpose flour or a gluten-free 1:1 all purpose flour substitute if you wish to make these gluten-free [ensure your oats are truly gluten free as well if this is a dietary restriction.]
- 1 cup brown sugar
- 3/4 teaspoon baking soda
- 1/2 teaspoon cinnamon
- 1/4 teaspoon salt
- 3/4 cup butter softened
Instructions
- Preheat oven to 350F and line an 8×8 baking pan with parchment paper, allowing some overhang [this will ensure the sides don't stick and that the bars can easily be removed from the pan for slicing].
- Place all of the chopped dates and water in a saucepan and heat over medium heat. Bring the ingredients to a boil, cooking them until the dates break down and create a thickened paste.
- Remove from heat and let cool while you make the oat crust.
- In a large mixing bowl, combine the oats, flour, brown sugar, baking soda, cinnamon and salt.
- Add the butter to the oat mixture, combining until crumbly. [You can use a pastry cutter or rubber spatula to do this, but if you don't mind getting a little messy, you can bring this together by rubbing or "pinching" the butter into the dry ingredients by hand to create the crumble.]
- To assemble the date squares, press half of the oat mixture into the bottom of the baking pan. Top the bottom crust with the thickened date mixture, spreading it in an even layer. Finally, add the remaining crust mixture on top, pressing down lightly.
- Bake for 30-35 minutes or until the top is lightly browned. Cool in the pan completely before cutting into squares.
Note: Metric ingredient measurements are provided as a courtesy using a third-party calculator and are rounded to the nearest unit. The recipes provided on this site have not been tested with metric measurements and their accuracy cannot be verified.
Nutrition
The nutritional information provided is based on third-party calculations and is an estimate only. Accurate nutritional facts will vary based on the particular brands used, portion sizes, measurement accuracy and more.