This classic apple pie recipe makes the perfect Fall dessert made completely from scratch! The saucy and perfectly sweetened apple filling and buttery, flaky pie crust create the perfect crowd-pleasing dessert.
Nothing says Fall like a slice of warm apple pie! I look forward to this time of year for so many reasons but at the top of my list is all the delicious fall treats!
Apple pie is a classic and easily my favourite way to put those gorgeous apples to good use!
There is something about deliciously sweet apples, a flaky pie crust, and warm spices that just soothes and comforts my soul. As much as I love to eat a slice of this apple pie, I also find it relaxing to make it too. I have always loved being in the kitchen and baking is therapy to me.
If you are not as keen on being in the kitchen, baking a pie from scratch, you can easily take a short cut with this recipe. Store-bought pie dough does the trick in a pinch and will definitely cut your prep time in half! As the filling is incredibly easy to whip up, this pie is a cinch to make!
No really, it is! I just peel and slice the apples, add them to a bowl with the other filling ingredients and mix them up! Voila! Set them into your ready made pie crust, top with a second pie crust and you have done all the “hard work”.
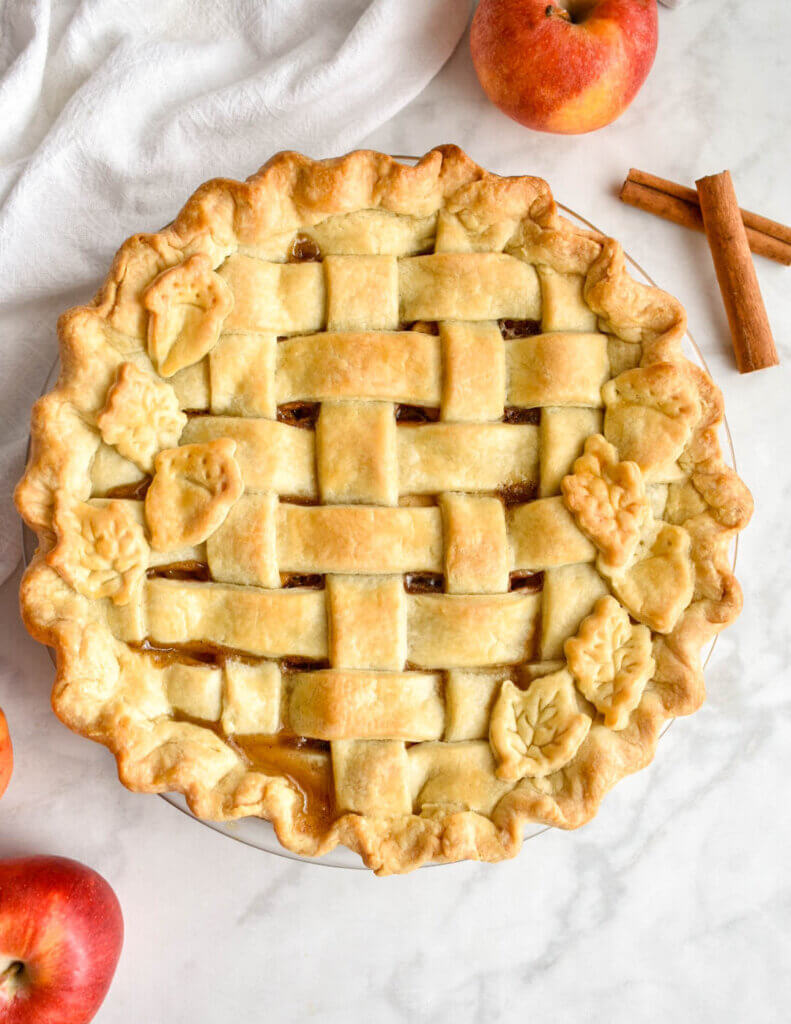
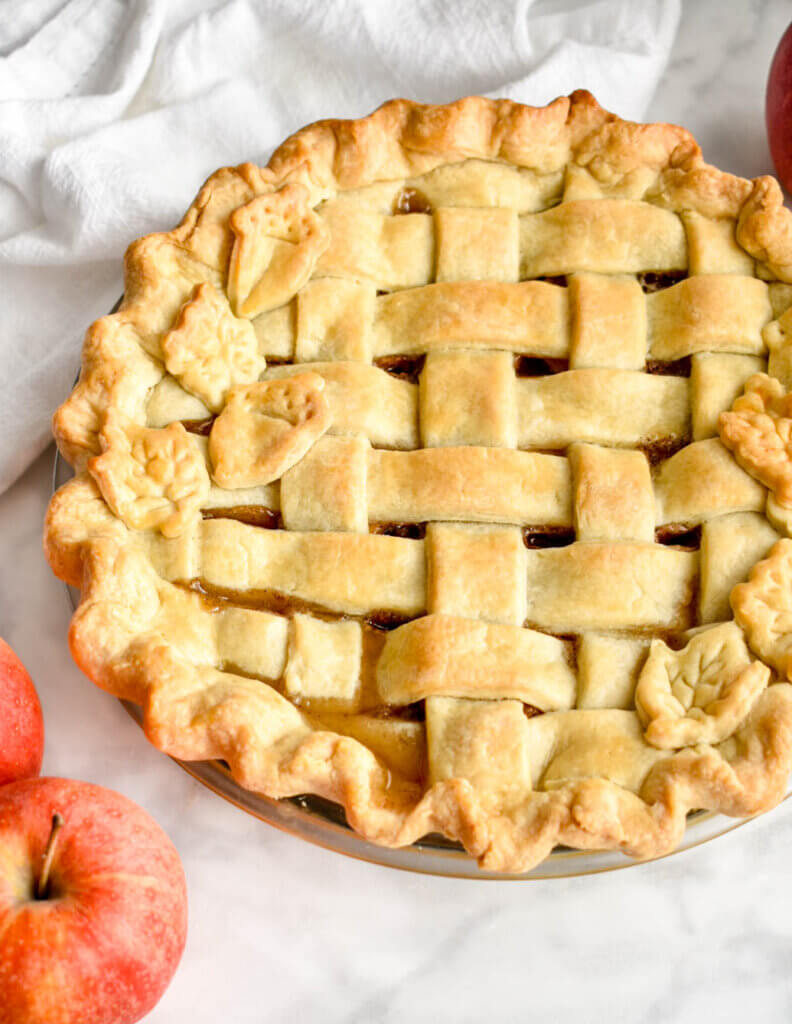
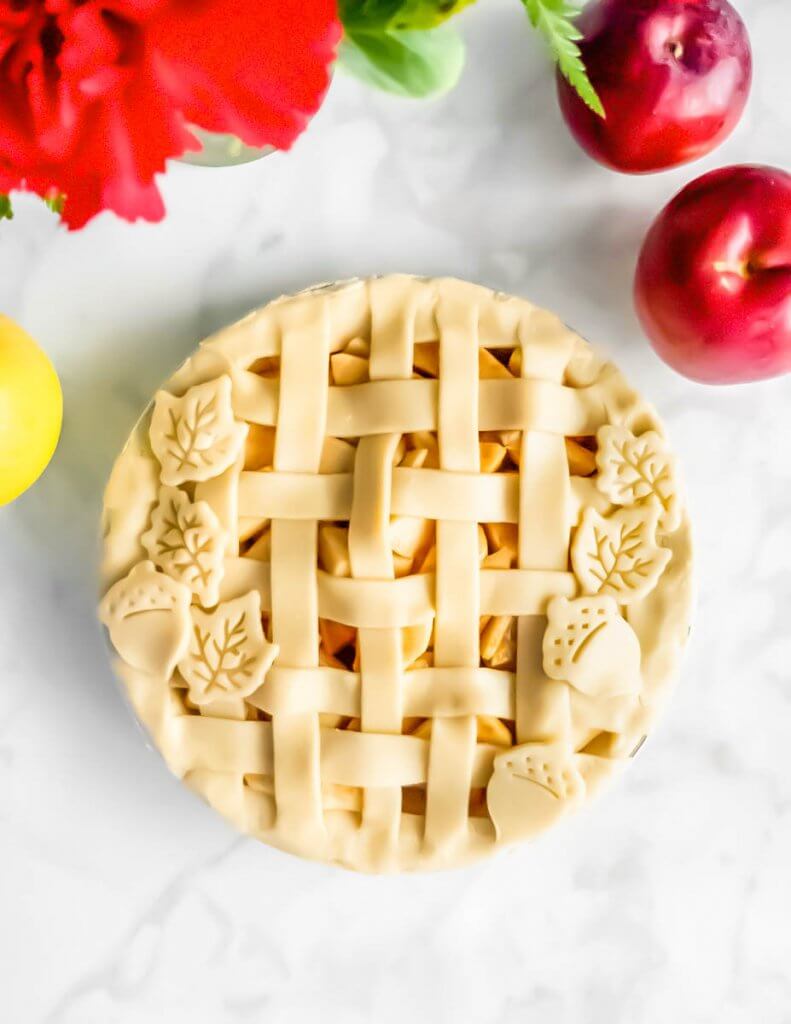
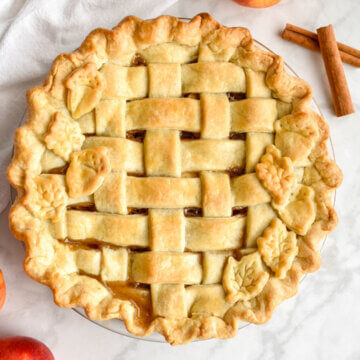
I opted to make a lattice pie crust which is a bit more involved but that isn’t necessary. I left instructions for a lattice crust as well as a regular pie crust in my recipe card so feel free to do as you wish.
Ingredients in Homemade Classic Apple Pie Filling
- Apples: peeled and sliced 1/4″ thick. I used honey crisp but other varieties such as Mutsu, Granny Smith, Gala, Pink lady and Golden delicious work as well.
- Vanilla extract: for added flavour.
- Sugar: equal parts white and brown sugar are used in the filling.
- Flour and Cornstarch: used to thicken all the juices that the apples will release, making a nice saucy filling that isn’t watering.
- Seasoning: Warm spices like cinnamon and nutmeg are used for the best flavour. Also a bit of salt enhances the flavour.
Note: Ingredient quantities and full instructions are in the recipe card at the end of this post.
How to Make Classic Apple Pie Filling:
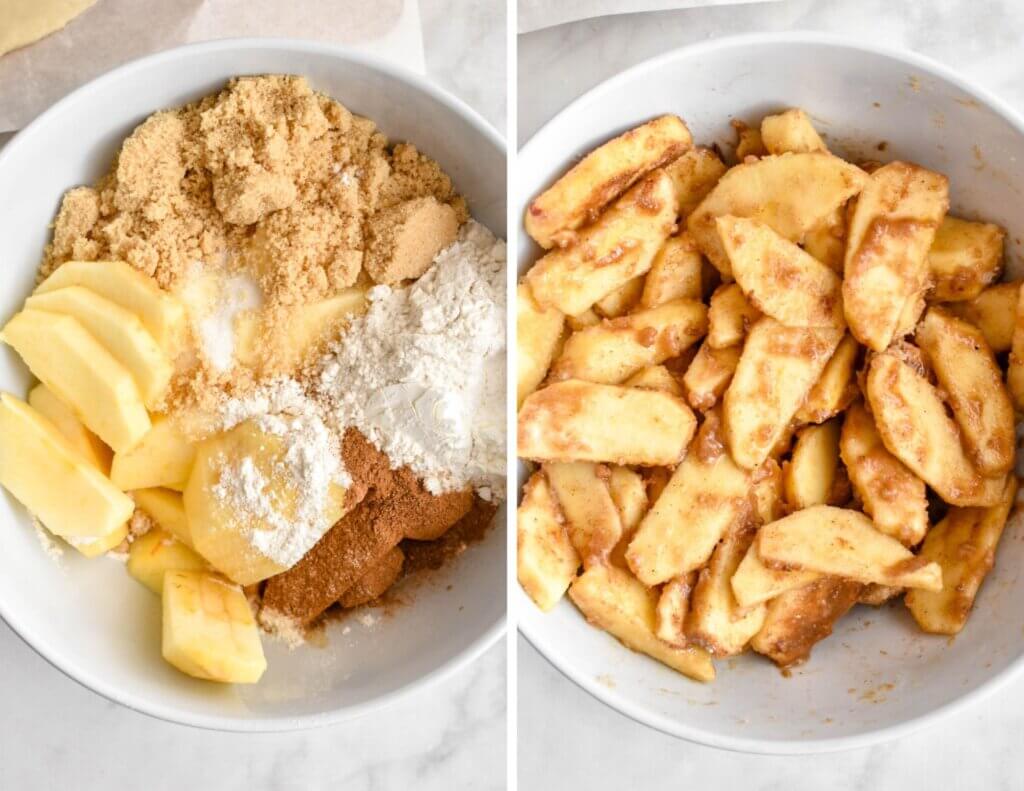
- Slice apples: Slice apples to 1/4 inch thickness and place them in a bowl.
- Mix all the filling ingredients: Add all of the filling ingredients in a bowl and toss together to coat the apples evenly. Set aside.
It doesn’t get any simpler than that, does it?
Ingredients in Homemade All Butter Pie Crust:
As mentioned above, you can opt for a store-bought pie crust to simplify the recipe and reduce your hands-on time. That said, nothing beats the taste of a homemade pie crust and that is what I usually use.
I prefer an all butter pie crust as you simply can’t beat the taste. To make it, I use:
- Flour: all purpose flour.
- Salt: enhances flavour.
- Butter: Cold and cubed. Opt for unsalted butter so that you can more easily control the salt levels in the pie crust. If you are using a salted butter, make sure it is not too salty and omit the additional salt in the recipe.
- Water: Ice cold water is used to ensure the pie crust remains cold.
Ingredient amounts and full instructions are in the recipe card at the end of this post.
Basic Steps for Making Easy Homemade Pie Crust
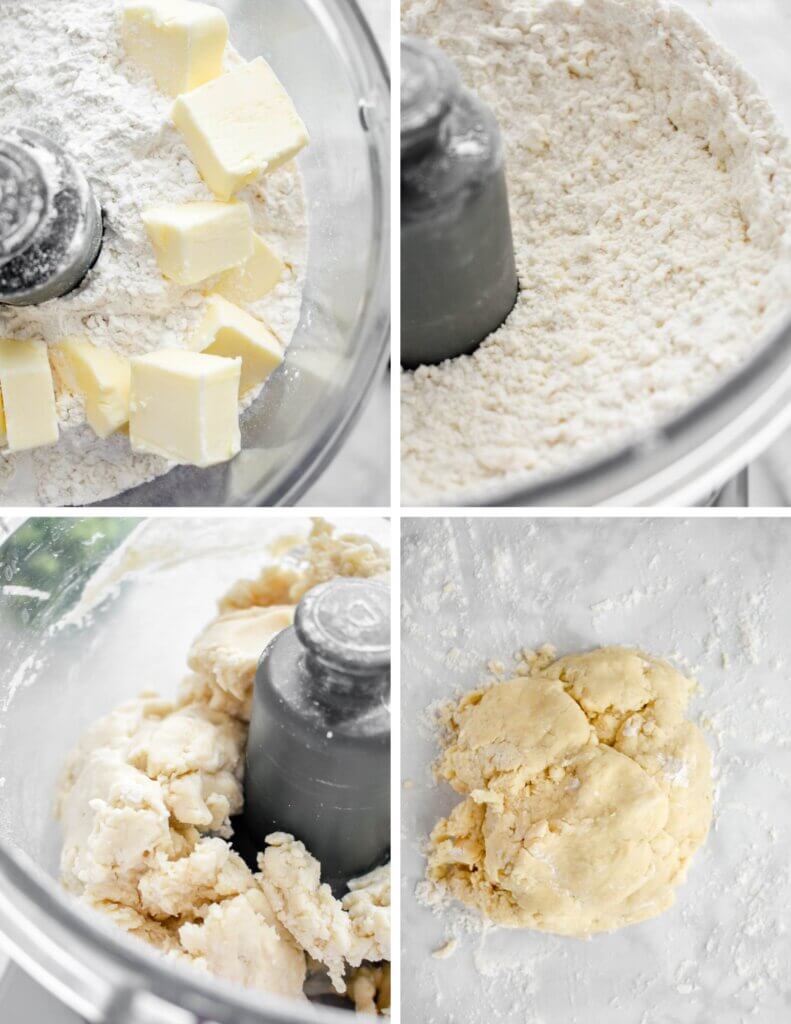
1. Add the dry ingredients and butter to a food processor. Alternatively you can use a bowl and pastry cutter.
2. Process until they form a coarse meal.
3. Add water to form into a dough.
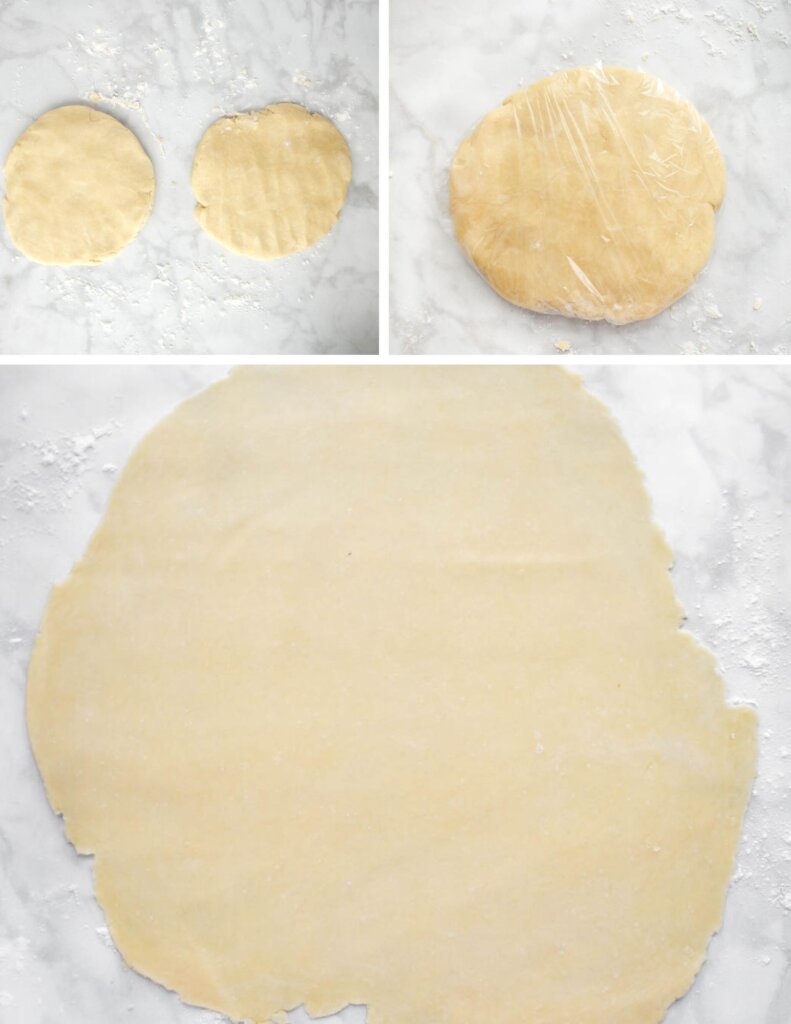
4. Transfer to a flat, lightly floured surface and bring together into a ball.
5. Separate dough into 2 portions.
6. Form dough into disks. Wrap one of them in plastic wrap and place it in the fridge to keep it cold while you work with the one disk.
7. Roll out your pie crusts!
Assembling an apple pie:
Essentially, assembling your apple pie comes down to these steps:
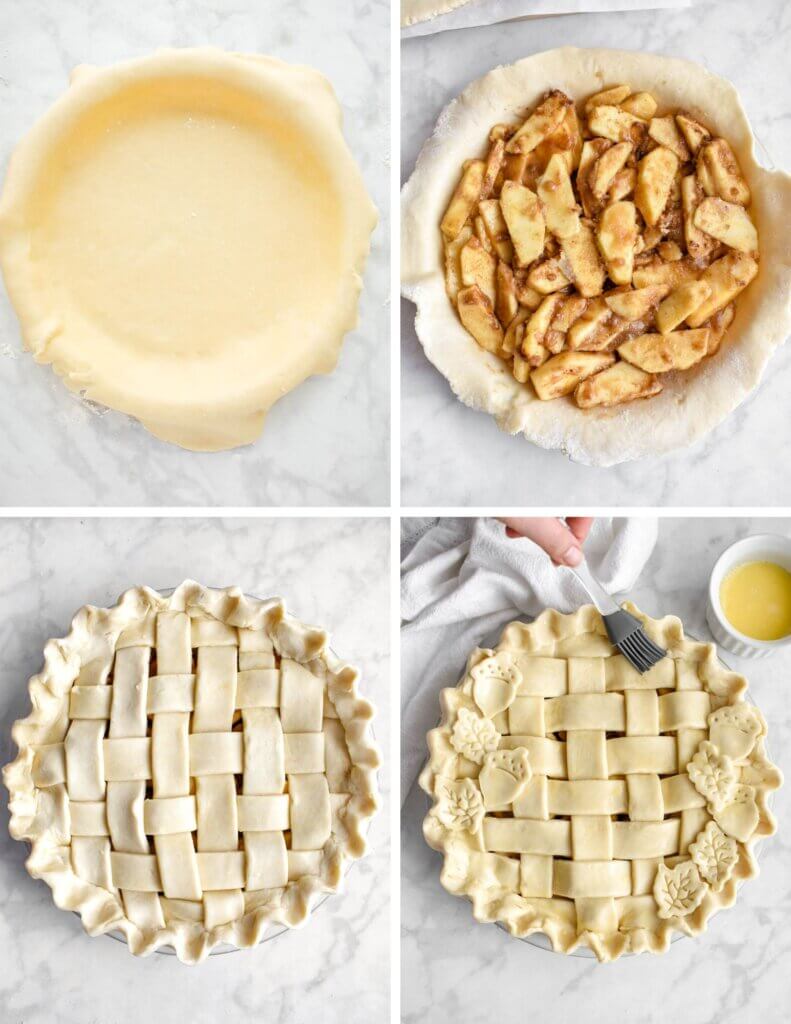
1. Roll out your bottom pie crust and place it in your pie dish.
2. Fill it with your apple pie filling.
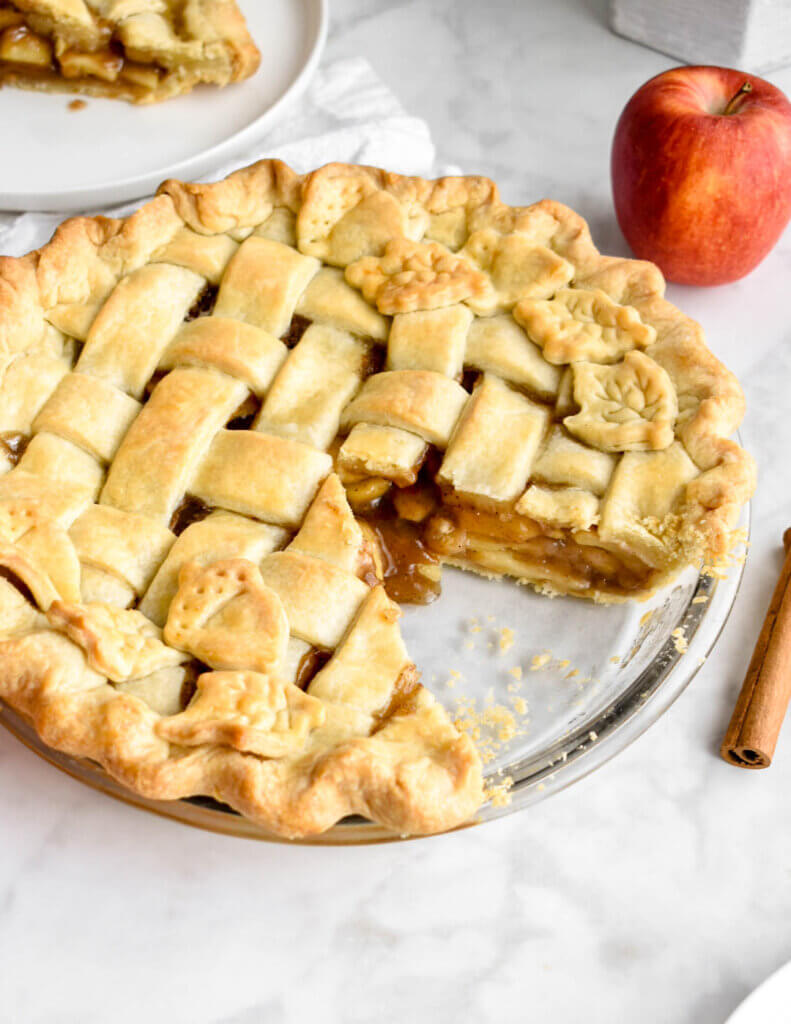
3. Add the top crust (see tips on a lattice crust below or just top with a simple pie crust with vent holes). [Note: I also added some fall shaped pie crust cutouts but this is entirely optional.]
4. Brush the pie crust with an egg wash.
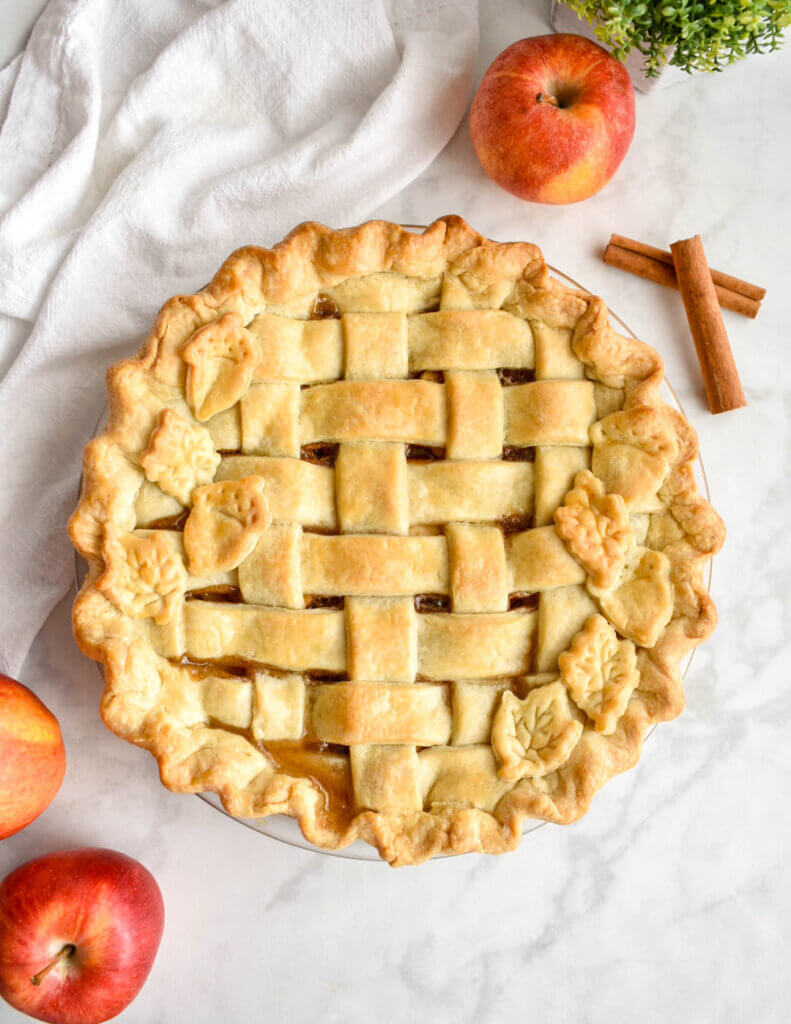
5. Bake until golden brown. I start baking the pie at 425F for 15 minutes and then reduce the temperature to 350F until it is golden brown.
6. Cool slightly before slicing.
How to Make a Lattice Crust
There are many ways to top a pie. I typically just roll out the pie crust and lay it on top, trimming the excess and poking some holes for ventilation as it bakes. Today, though, I decided to go with a lattice pie crust.
I love the way they look and I was eager to give my apple pie a fancier look. I also added some leaf cutouts to my pie cause I thought it was cute.
If you have not tried making a lattice pie crust, it is surprisingly easy to do! Sure, its a bit more “work” than a plain pie crust, but it really isn’t hard at all.
The steps I followed are as follows:
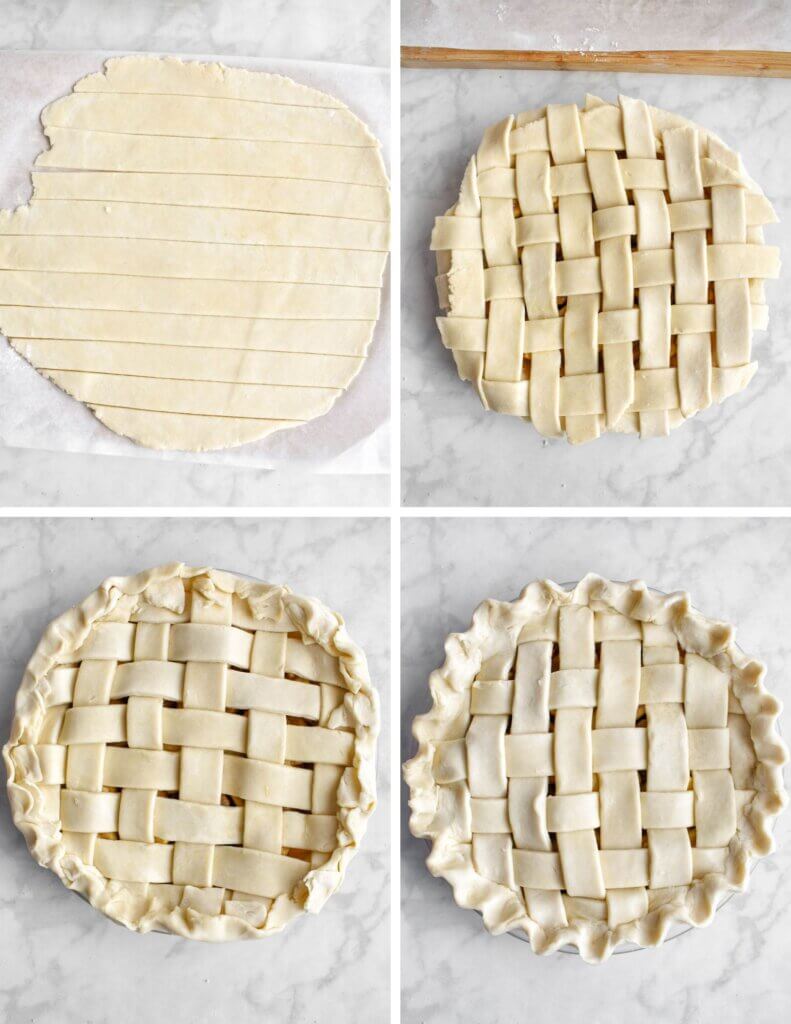
- Roll out your pie crust and then use a pizza cutter to cut strips of pie dough. [Note, if you are spacing out your lattice crust, one pie crust will suffice. If you are looking to make the lattice crust close together (i.e. not leaving big gaps where you can see the filling), then you may need to make an extra pie crust.]
- Lay the lattice crust over top of your pie. (See the video below)
- Trim any large overhanging pieces and then fold over the edges, pinching them together to form a thicker seem.
- Using your fingers or knuckles, create a crimp edged (optional).
I’ve included a link to a video to help explain how to do it. Its super simple and easy to follow!
Thin vs. thick lattice crust:
I have made this recipe with lattice crusts that are thicker and closer together (i.e. with only small gaps showing the filling as in my photos in this post) as well as a lattice crust that is spaced out more and shows more filling.
If you are wanting to replicate the thick, lattice crust in my photos, I recommend making an extra half recipe of the crust. This will ensure you have enough strips as you will require more. It also will give you extra pie dough to make the cut out decorations if you choose to make them.
I included the ingredient quantities you would need for this design in the notes section in the recipe card.
Don’t want to make extra pie dough? No worries, you can either just roll out the pie crust without doing the lattice work or you can make a lattice crust that has bigger gaps (and therefore uses less pie strips). The picture below shows what that would look like.
How to Store Apple Pie
Apple pie can be made several days before you intend to serve it. To store it, cover the pie with plastic food wrap after it has cooled. If you intend to serve it the next day, it can be stored at room temperature. If you are making it a few days in advance (I have done so up to 4 days in advance), then store the pie in the fridge.
Can you freeze Homemade Classic Apple Pie?
Yes, you can freeze homemade apple pie. After baking your pie, allow it to cool completely. Then wrap it up tightly in plastic food wrap and foil. You will want to make sure it is wrapped up nicely to avoid freezer burn.
What to Serve with Apple Pie
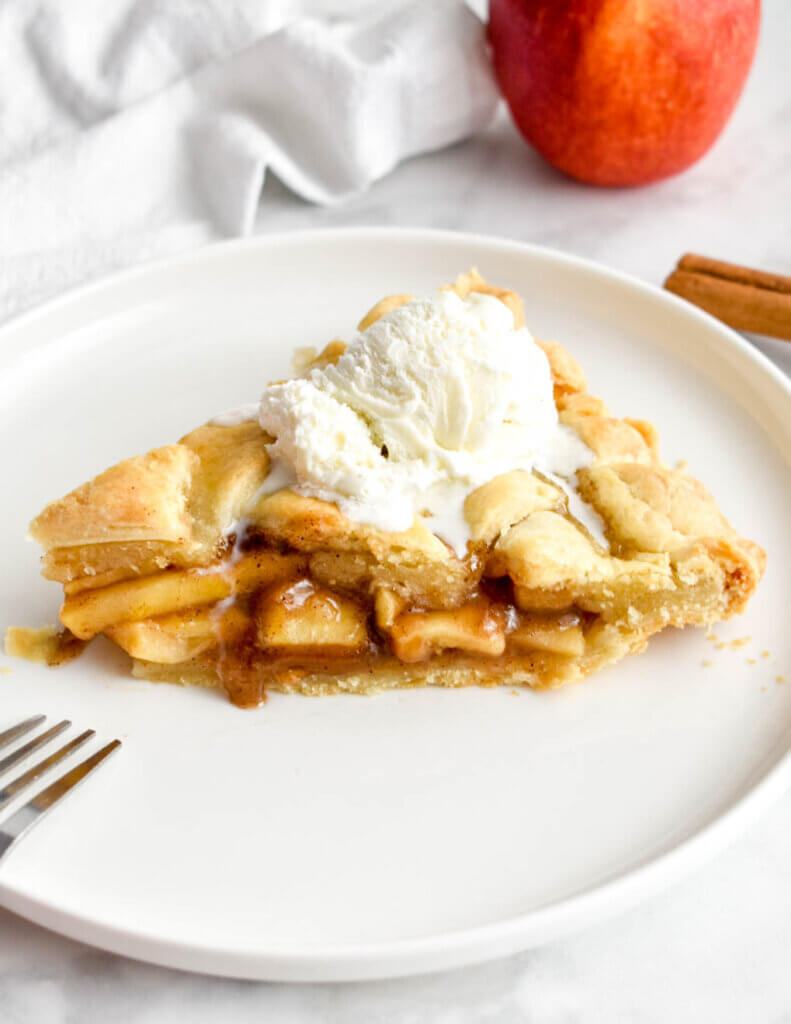
As far as I am concerned, serving apple pie with a scoop of ice cream is a must. There is no better combination that a generous scoop of vanilla ice cream on top of a warm slice of apple pie.
Other options include a drizzle of caramel sauce.
I hope you enjoy this recipe! Happy Baking!
-Cathy
You may also like:
Apple Pie Bars
Apple Ginger Galette
Classic Apple Pie
Ingredients
For the apple pie filling:
- 4 large apples peeled and sliced 1/4" thick
- 1 teaspoon vanilla extract
- 1/3 cup white sugar
- 1/3 cup brown sugar
- 3 tablespoons flour
- 1 teaspoon cornstarch
- 1 teaspoon cinnamon
- 1/4 teaspoon nutmeg
- 1/4 teaspoon salt
For the Pie Crust*
- 2 1/2 cups flour
- 1/2 teaspoon salt
- 1 cup butter cold, cubed
- 8-12 tablespoons ice cold water
Fro the egg wash:
- 1 egg
- 1 tablespoon water
Instructions
- To make the filling, add all of the filling ingredients in a bowl and toss together to coat the apples evenly. Set aside.
- Preheat oven to 425F. To make crust, add flour and salt in food processor. Add cold butter and pulse until it resembles coarse meal. Add 8 tablespoons of ice cold water and pulse a few times. The dough should be beginning to clump together. If it is not, add more water and pulse.
- Turn the dough out onto a floured surface and divide the dough in half. Knead each half into a ball. Flatten down into disks. Wrap the disk in plastic wrap and set it in the fridge for now.
- Using a floured rolling pin, roll the first disk out to be slightly larger than your pie dish. Carefully transfer onto pie plate and trim any excess dough. Fill the pie crust with the apple filling.
- Roll out the second pie crust using the same method as the first.
- Note: If at any point the pie crust warms up and becomes too soft, place it in the fridge to firm it up.
- For a simple top pie crust: Place the second pie crust over the filling and trim the excess. Press the edges down to seal the pie. You can do this with your fingers or using the tines of a fork. Poke a few slits in the pie using a knife.
- For a lattice pie crust: Use a pizza cutter or sharp knife to slice the pie crust into strips (any thickness you desire, just make them uniform. Note: it is easier to do thicker strips as they won't be as delicate). Cover the pie using a lattice method (see post above for tips). Trim the excess pie crust. Fold the edges over and pinch lightly with your fingers to create a seal. If desired, create a crimped edge (see the blog post above for guidance.)
- Pop the pie in the fridge for about 10 minutes to ensure the crust is still cold.
- Meanwhile, mix the egg with water to create an egg wash. Remove the pie from the fridge and brush the pie with the egg wash.
- Bake the pie for 15 minutes at 425F and then reduce temperature to 350. Bake for 40-50 more minutes or until the crust is a nice golden brown and the filling is bubbling. Tip: if the pie crust is browning too quickly, tent it loosely with foil to avoid over-browning.
- Remove pie and let it cool slightly before slicing to allow the filling to set. Slice and serve with a big scoop of vanilla ice cream!
Notes
Note: Metric ingredient measurements are provided as a courtesy using a third-party calculator and are rounded to the nearest unit. The recipes provided on this site have not been tested with metric measurements and their accuracy cannot be verified.
Nutrition
The nutritional information provided is based on third-party calculations and is an estimate only. Accurate nutritional facts will vary based on the particular brands used, portion sizes, measurement accuracy and more.


excellent recipe! made pies with crab apples. was sweet with a little tartness.
Thank you!
Tried and true recipe! Thanks for sharing. It makes a delicious pie every time!
So happy you enjoy the recipe!
Am I able to freeze this filling recipe?
You can 🙂