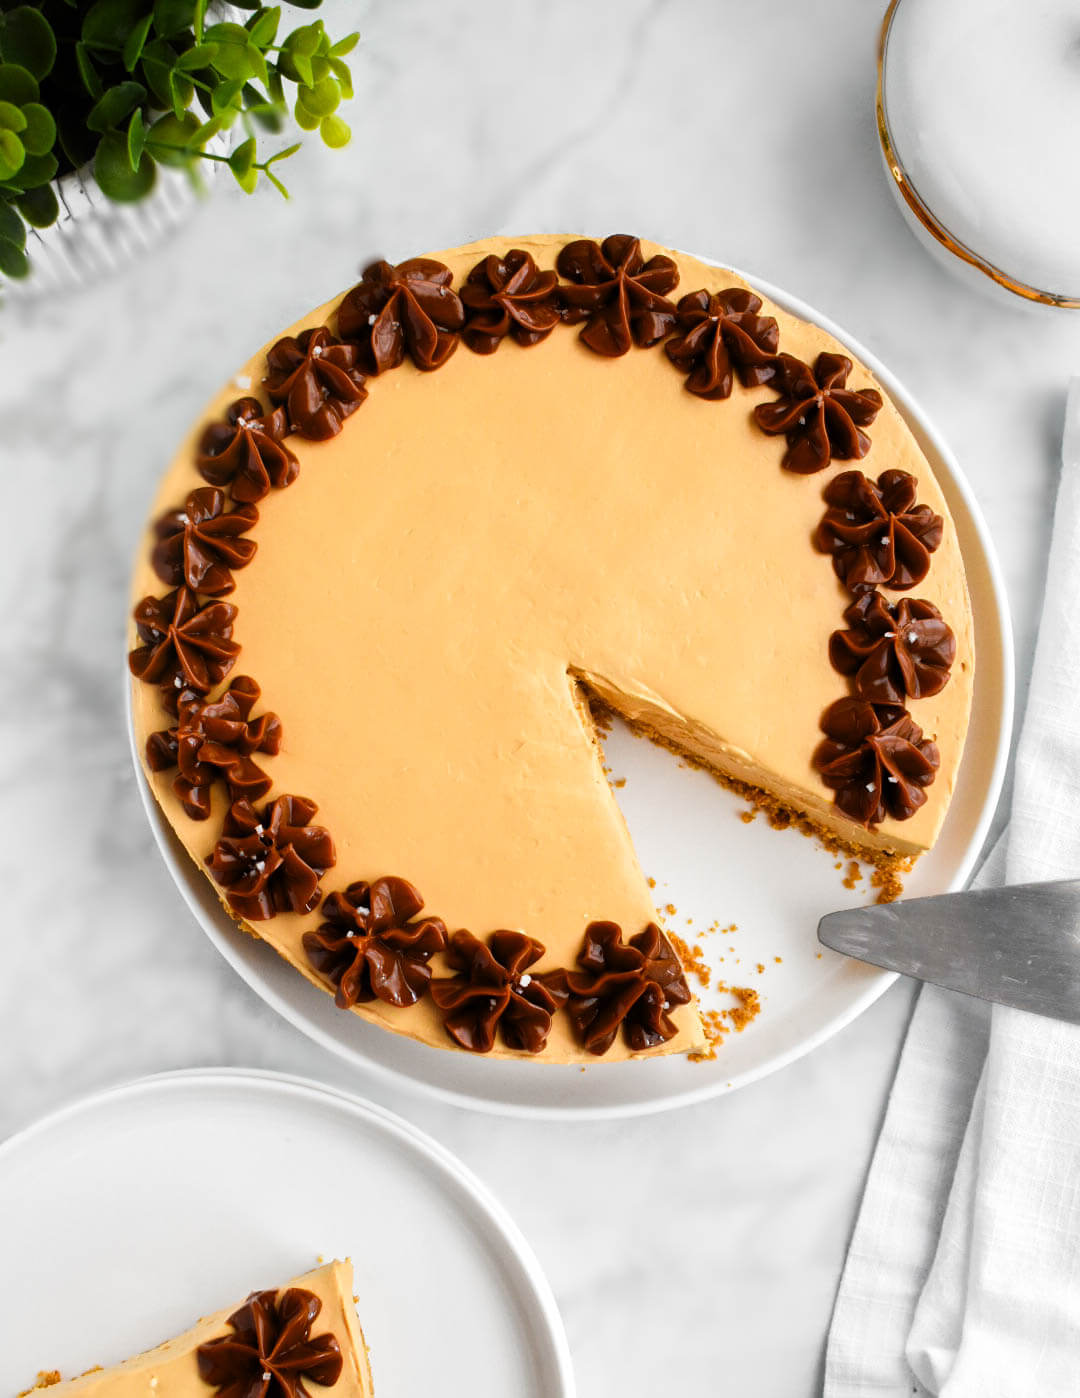
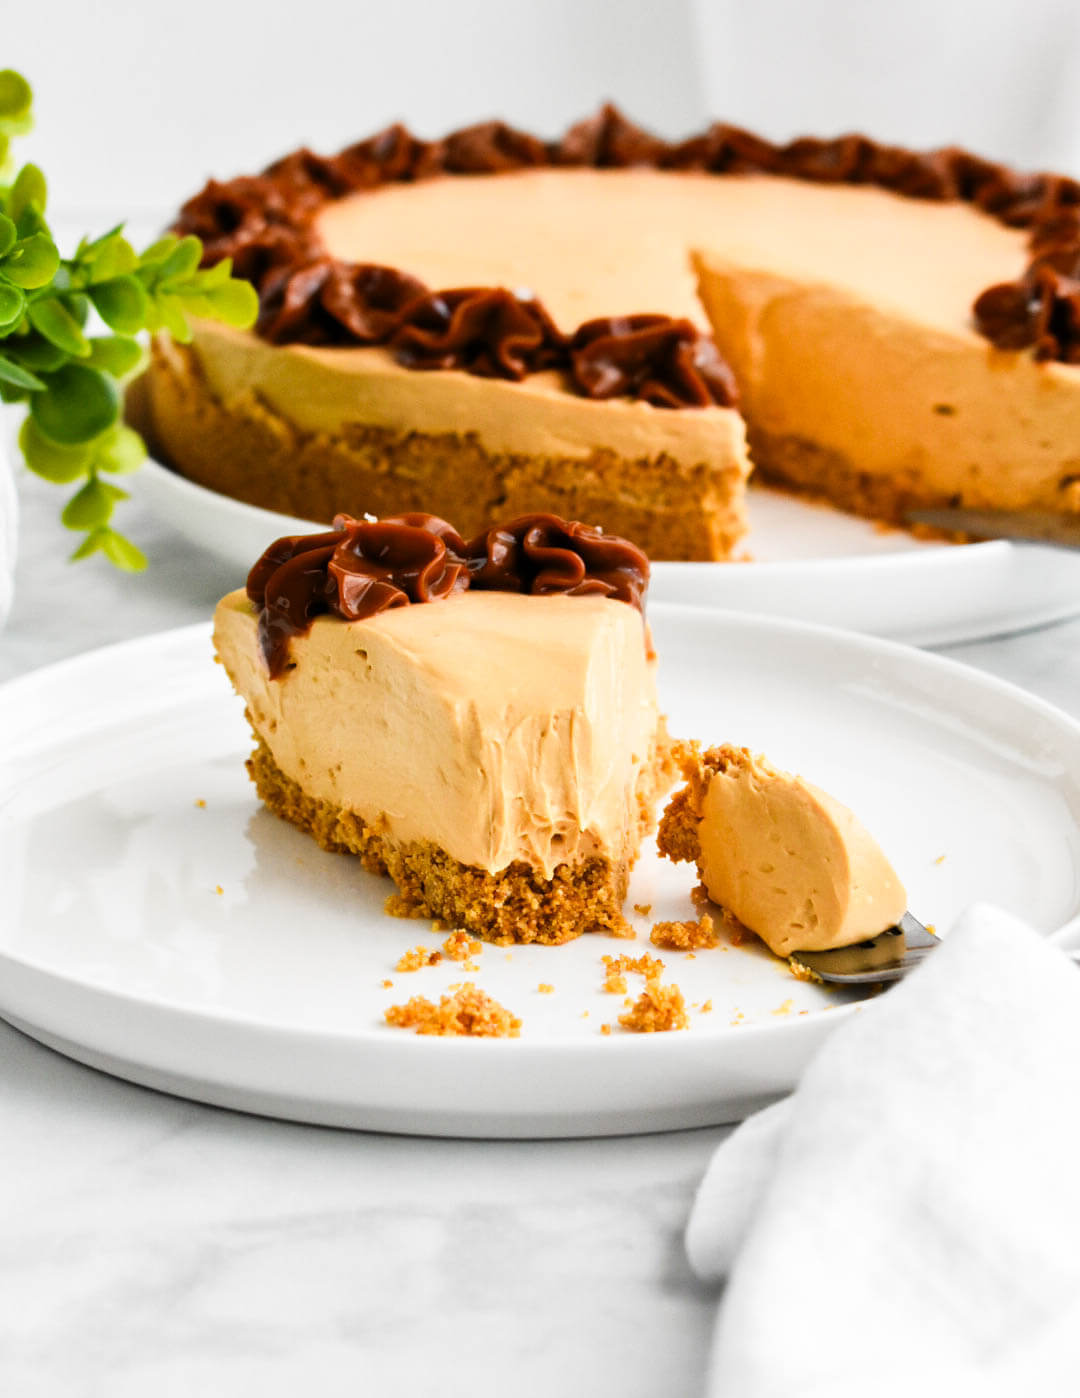
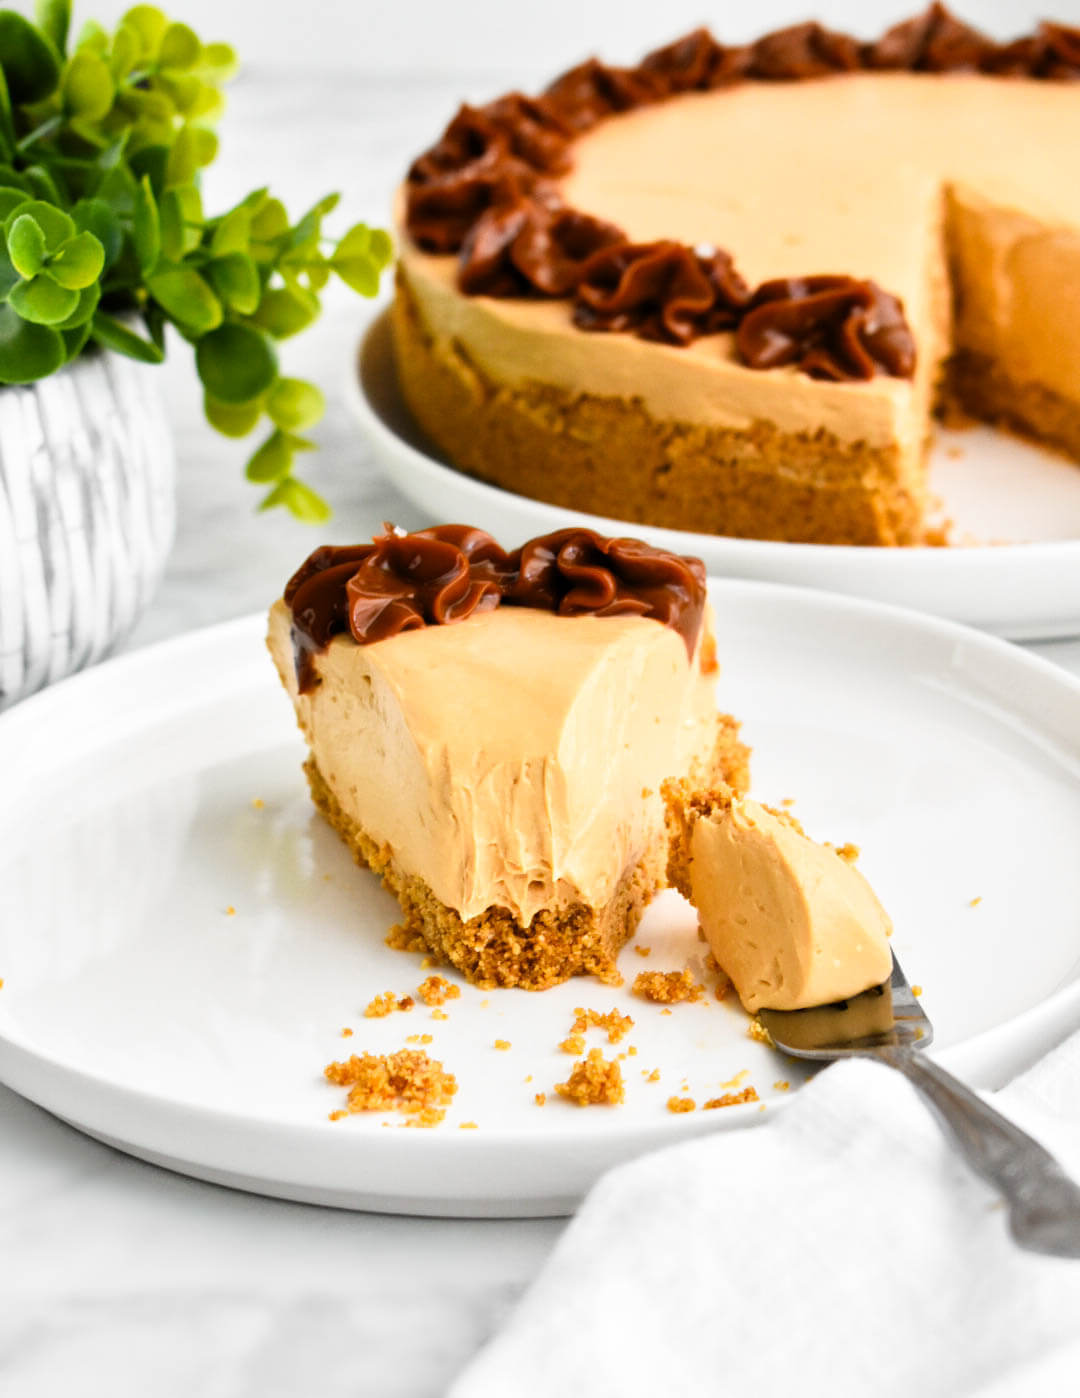
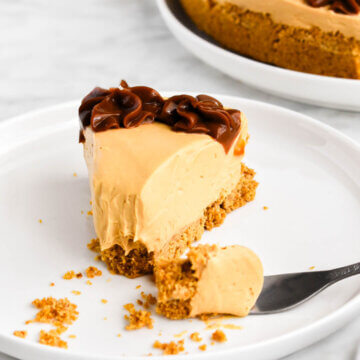
This No Bake Dulce de Leche Cheesecake is everything you dream of in a cheesecake – a lusciously smooth and creamy cheesecake infused with dulce de leche and a deliciously buttery graham crust. The best part? No oven is required for this recipe!
Cheesecake is a delightfully creamy treat that always satisfies that sweet-tooth craving. It’s no surprise that it is almost always included on restaurant dessert menus.
While it’s wonderful served plain, it becomes even better when infused with other fun flavors. Blueberry Cheesecake, Cranberry Cheesecake, and Lemon Cheesecake are some of my favorite cheesecake flavors. This Dulce de Leche Cheesecake is right up there with these favorites.
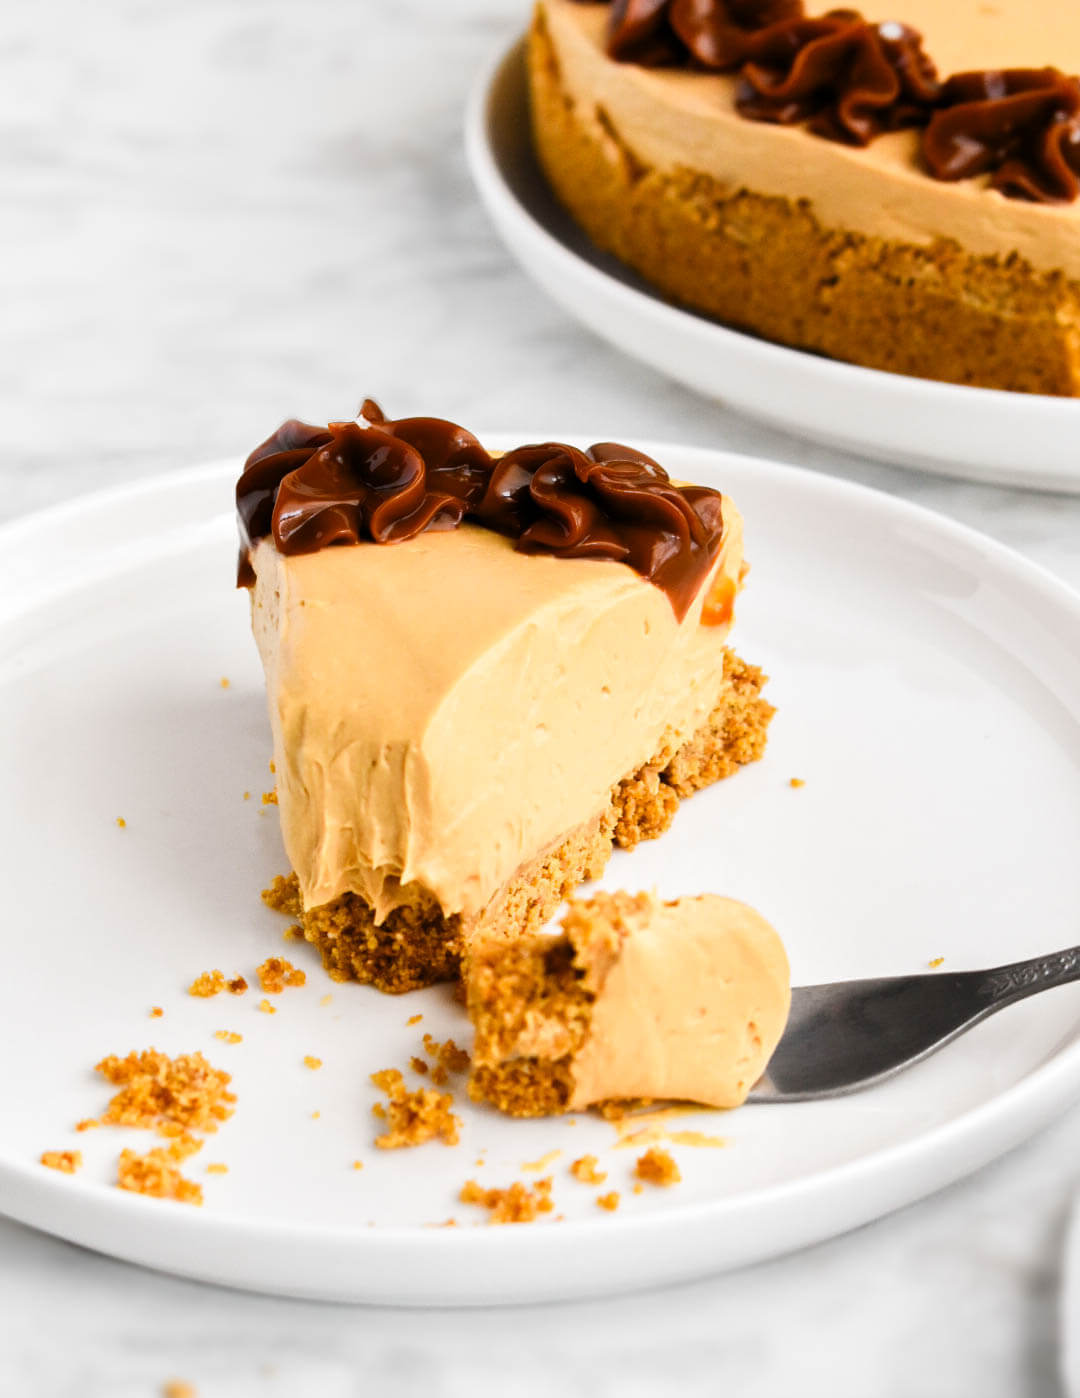
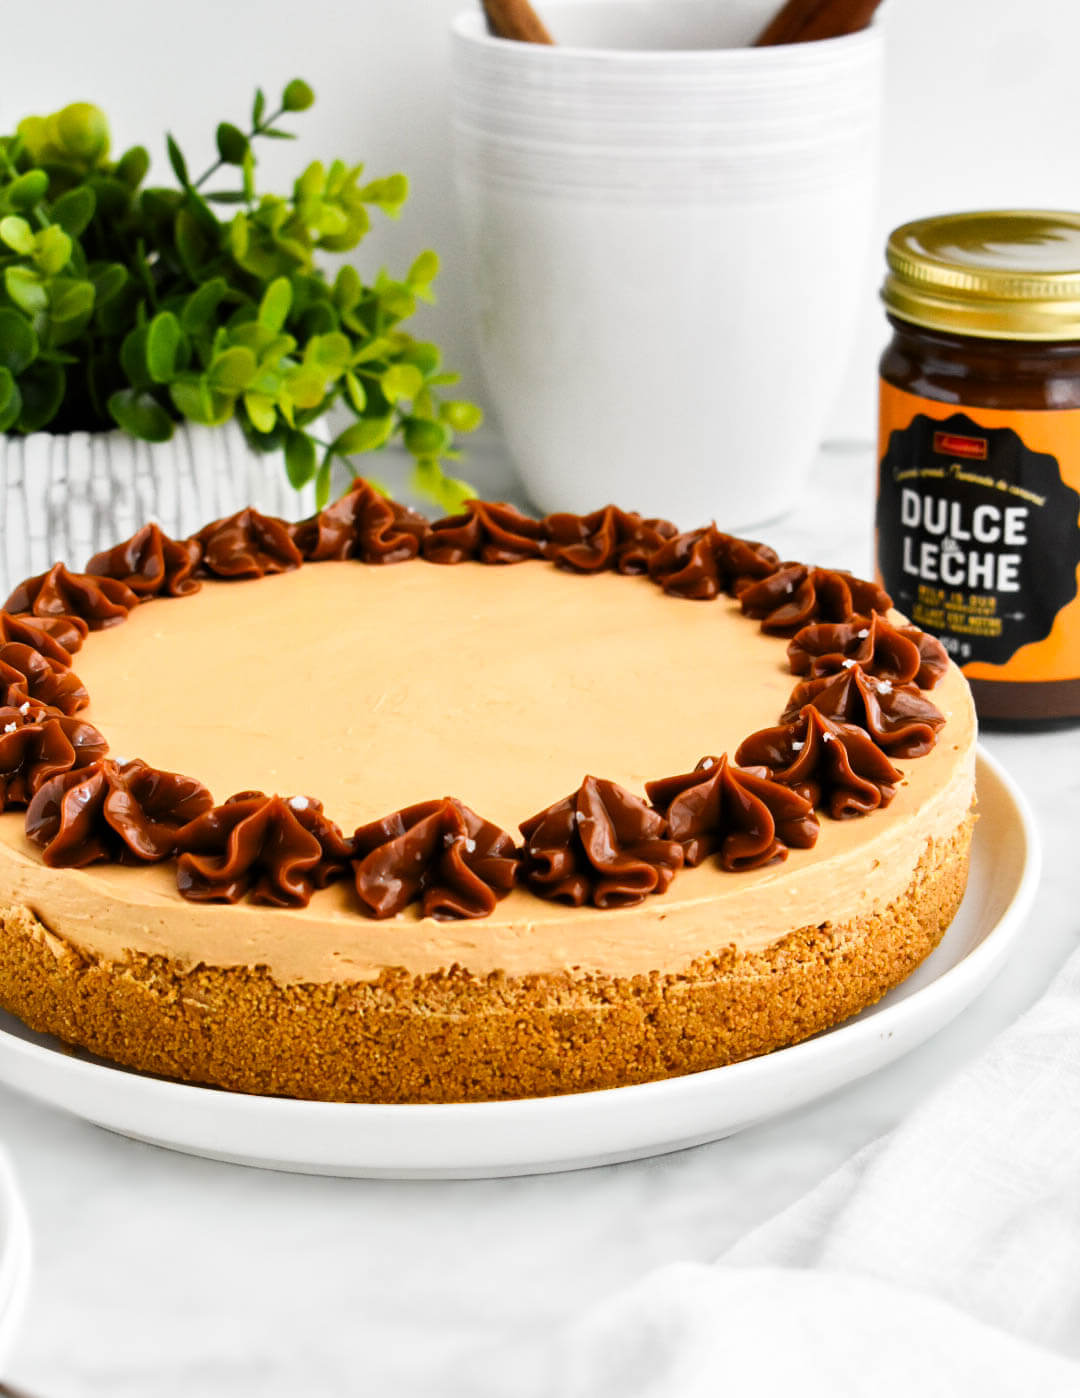
This No Bake Dulce de Leche Cheesecake has everything that is essential in a perfect cheesecake. It has a delightfully smooth, creamy cheesecake layer that has dulce de leche mixed right into it. It all sits on top of a buttery graham crust and is decorated with even more dulce de leche.
I am a huge fan of no bake cheesecakes like this one. They are light, creamy, and so much easier to make. No worrying about your cake cracking while baking or fiddling around with things like a bain marie (water bath).
Why we love this recipe
- It’s delicious! Light, creamy and perfectly infused with dulce de leche flavor.
- It makes a great dessert for gatherings any time of year.
- You don’t need to heat up an oven or create a water bath to make this cheesecake!
What is dulce de leche?
If you are familiar with dulce de leche, you know that it has a wonderful, but delicate sweet flavor. While it is often compared to caramel, it is actually different – more mellow than the sharp, sweet taste of caramel. The flavor is more reminiscent of a butterscotch than caramel. It is also thicker, and therefore less pourable than caramel is.
Dulce de leche is essentially milk and sugar (or just sweetened condensed milk) that has been cooked until it “caramelizes”. The end result is thick and silky, making it a wonderful spread for toast (think of it as a milky jam), a good thick filling for cookies like Dulce de Leche Sandwich Cookies (Alfajores), or even stirred into coffee like in a Dulce de Leche Latte.
In this cheesecake, it is mixed right in to flavor the cake but also sturdy enough to pipe on top of it. I used store-bought dulce de leche to make my cheesecake, though you can easily make your own with cans of sweetened condensed milk. If you are using store-bought, just be sure that the dulce de leche is thick and not runny.
Ingredients in No Bake Dulce de Leche Cheesecake
- Graham crumbs: The base of this cheesecake. Mixed with melted butter to make a buttery crumb base.
- Butter: helps bind the graham crumbs for the base as well as add a buttery flavor.
- Sugar: granulated white sugar is used for the base and icing sugar (aka confectioners sugar or powdered sugar) is used in the cheesecake layer.
- Cream cheese: I use 3 “bricks” of softened cream cheese – 24oz.
- Dulce de leche: added into the cheesecake layer as well as used to decorate the cake.
- Cool whip: mixed into the cheesecake layer. Makes the cheesecake layer light and airy.
- Vanilla extract: for flavor.
- Flaky salt: for decorating.
**Note: Ingredient quantities and full instructions are in the recipe card at the end of this post.**
How to make No Bake Dulce de Leche Cheesecake
This dulce de leche cheesecake essentially comes down to 3 components:
- the buttery crust
- the cream cheese layer
- and the topping/decorating
Prepare the crust:
- Line the bottom of a 9 inch spring form pan with parchment paper.
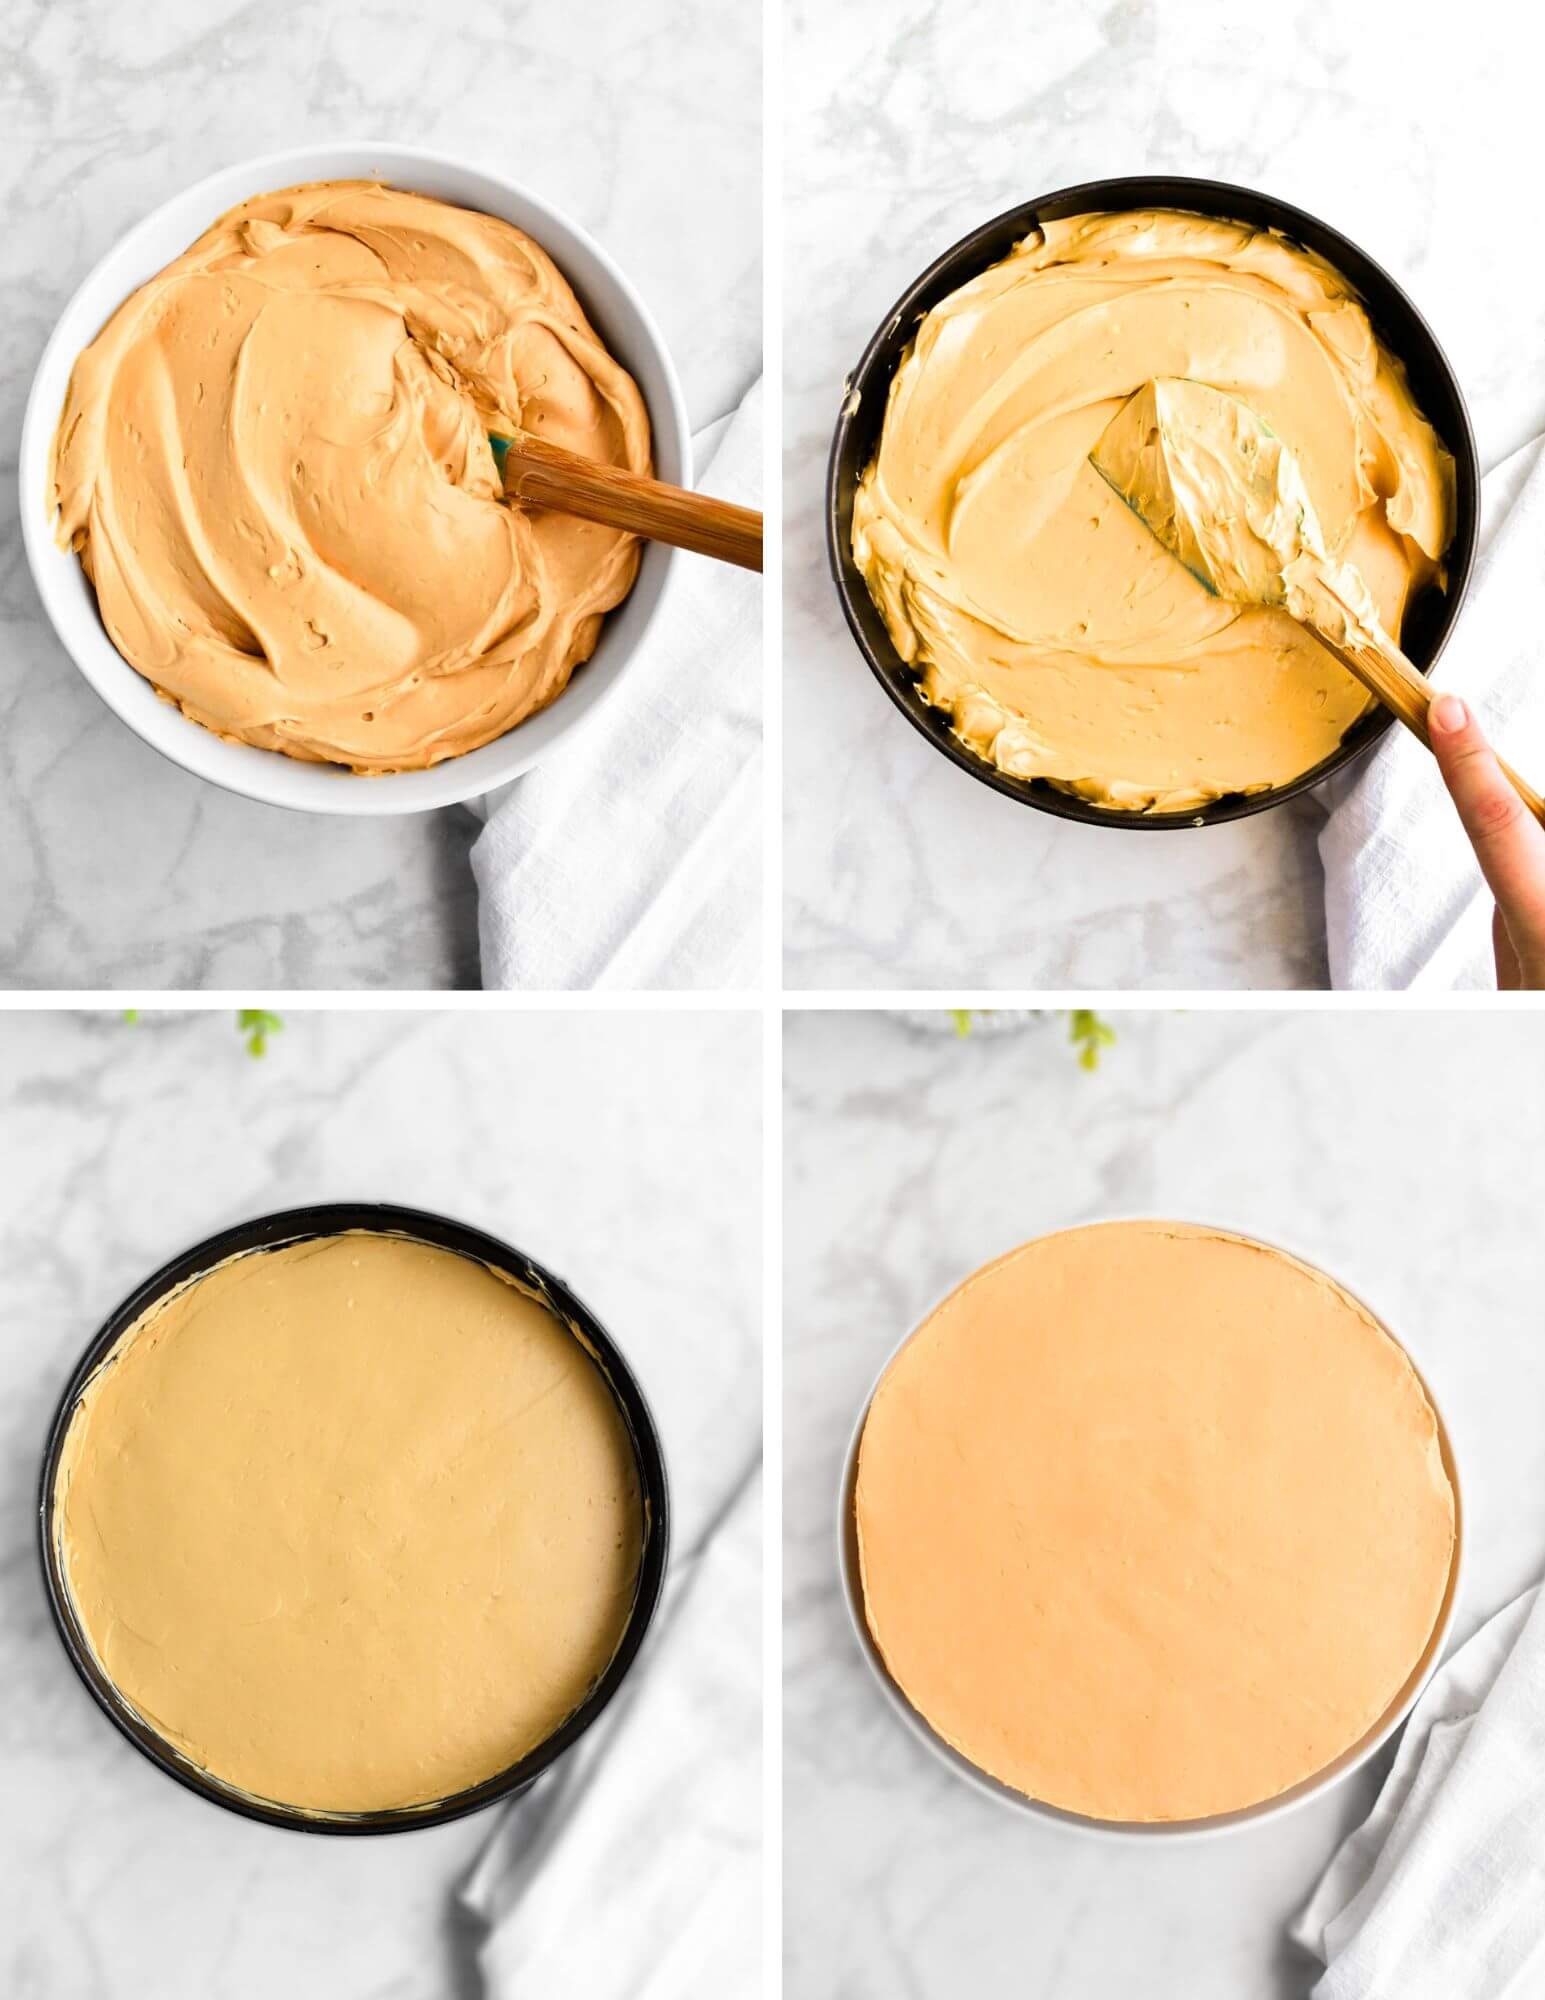
- In a large bowl, add the graham crumbs, melted butter and sugar and mix together. Press the graham crust mixture evenly onto the bottom of the pan and place in the fridge to chill.

Prepare the cream cheese layer.
- In a large bowl using a hand mixer (or in the bowl of a stand mixer), mix the softened cream cheese until fluffy. Add the dulce de leche, cool whip, sugar, and vanilla and mix until smooth.
- Spread the cream cheese mixture evenly over the graham crust.
- Chill in the refrigerator for 3-4 hours to set.
Optional toppings:*
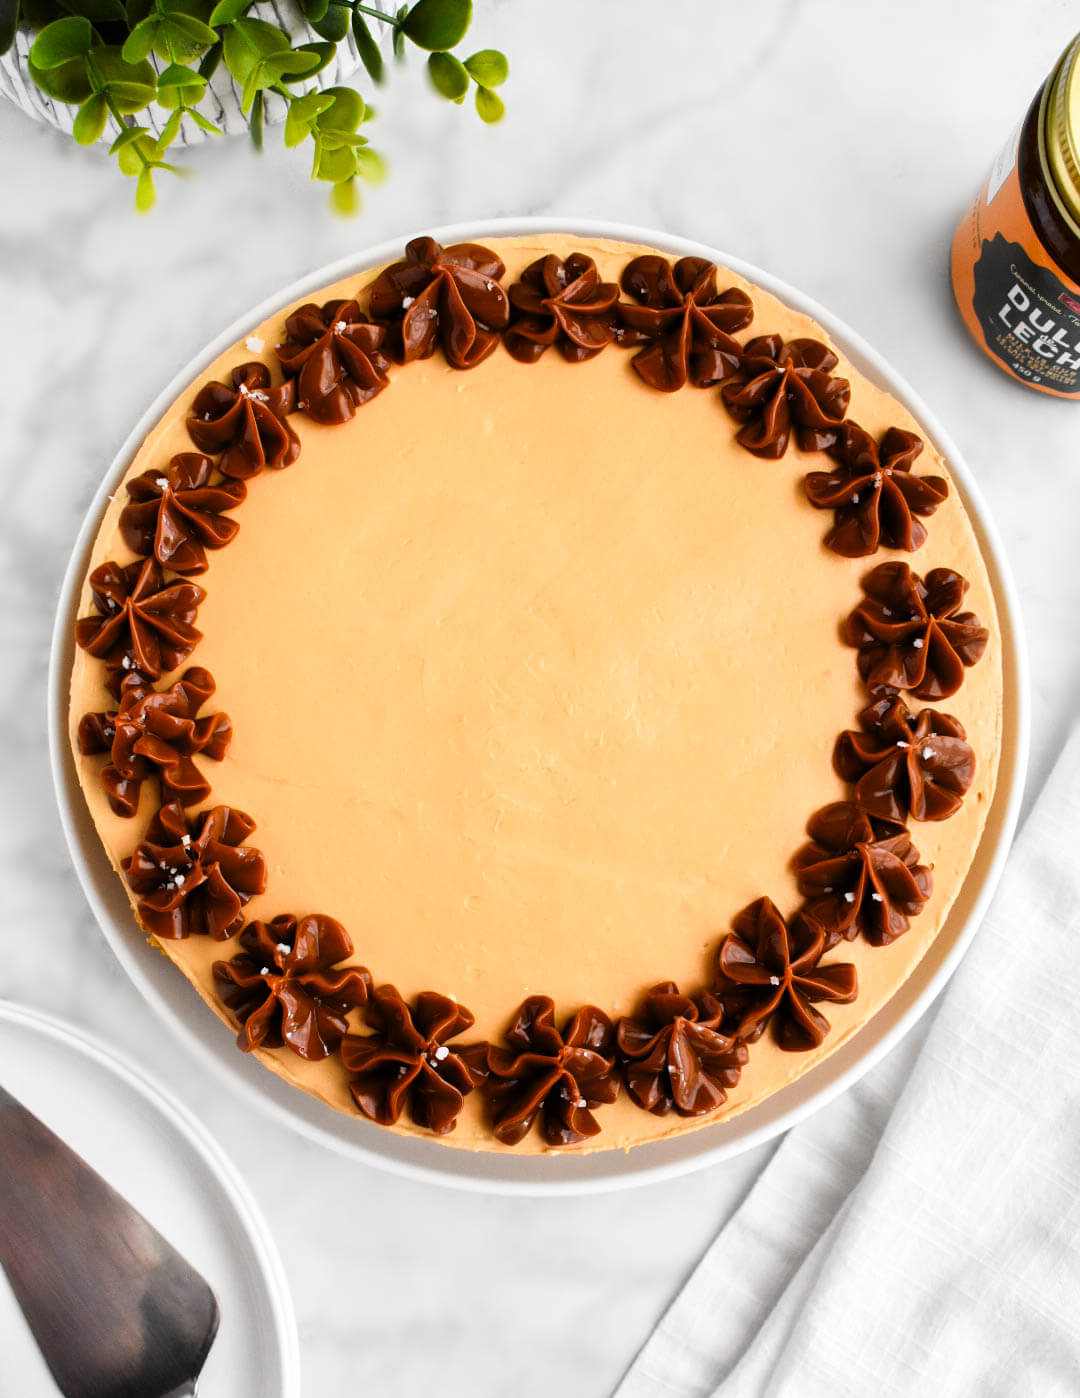
- If desired, decorate with dollops of thick dulce de leche around the border of the cheesecake. Sprinkle the border with flaky salt. Alternatively, you can drizzle the dulce de leche over the entire cheesecake or use more dulce de leche to spread a thin layer over top of the cheesecake.

Tips for best results
- Soften your cream cheese before making your cake. In order to ensure your cheesecake is lump-free and ultra smooth, it is important that the cream cheese if fully softened.
- If you still have lumps, use a food processor. If you have followed the tip mentioned above above but still have lumps in your filling, you can pop the cream cheese mixture (in batches) into a food processor and pulse it until smooth.
- Chill your cheesecake. You will need to allow plenty of chill time for your cheesecake to set up. Since the cream cheese had to soften to be made into a smooth cheesecake, it needs to firm up again. Slice into your cheesecake too early and you will find it will be far to soft and wont hold it’s shape.
Storing your cheesecake
Your cheesecake can be stored in the fridge for 4-5 days. You will need to cover it with plastic food wrap or place slices into an airtight container.
Freezing leftover cheesecake
This cheesecake can also be frozen for future enjoyment. It can be frozen for up to 3 months.
To freeze the cheesecake, I recommend wrapping it in plastic food wrap and then again in aluminum foil to best protect it from freezer burn. If you are freezing a large portion of cheesecake, you can place small pieces between slices to make it easy to thaw out individual slices, as needed.
More Dulce de Leche recipes:
Alfajores -Dulce de Leche Sandwich Cookies
Dulce de Leche Latte
Looking for more no-bake desserts? Check out:
No-Bake Cranberry Cheesecake
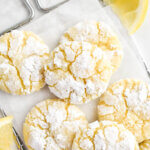
Lemon Cheesecake (No Bake)
No Bake Blueberry Cheesecake
Healthy Peanut Butter Chocolate Chip Cookie Dough
Oreo Truffles
Did you love this recipe? Please consider leaving us a comment and a 5-star 🌟🌟🌟🌟🌟 rating in the recipe card below.
Don’t forget to keep up with us on Facebook, Instagram, and Pinterest!
No Bake Dulce de Leche Cheesecake
Ingredients
For the crust:
- 2 cups graham crumbs
- 1/2 cup butter melted
- 2 tablespoons sugar
For the cheesecake layer:
- 24 oz cream cheese softened (3 packages)
- 1 1/4 cup dulce de leche
- 3 cups cool whip (a 1L container)
- 3/4 cup icing sugar (i.e. confectioners sugar or powdered sugar)
- 1 teaspoon vanilla extract
Optional toppings:
- 1/2 cup dulce de leche for decorating
- flaky salt for decorating
Instructions
Prepare the crust:
- Line the bottom of a 9 inch spring form pan with parchment paper.
- In a large bowl, add the graham crumbs, melted butter and sugar and mix together. Press the graham crust mixture evenly onto the bottom of the pan and place in the fridge to chill.
Prepare the cream cheese layer.
- In a large bowl using a hand mixer (or in the bowl of a stand mixer), mix the softened cream cheese until fluffy. Add the dulce de leche, cool whip, sugar, and vanilla and mix until smooth.
- Spread the cream cheese mixture evenly over the graham crust.
- Chill in the refrigerator for 3-4 hours to set.
Optional toppings:*
- If desired, decorate with dollops of thick dulce de leche around the border of the cheesecake. Sprinkle the border with flaky salt. Alternatively, you can drizzle the dulce de leche over the entire cheesecake or use more dulce de leche to spread a thin layer over top of the cheesecake.
Notes
Note: Metric ingredient measurements are provided as a courtesy using a third-party calculator and are rounded to the nearest unit. The recipes provided on this site have not been tested with metric measurements and their accuracy cannot be verified.
Nutrition
The nutritional information provided is based on third-party calculations and is an estimate only. Accurate nutritional facts will vary based on the particular brands used, portion sizes, measurement accuracy and more.