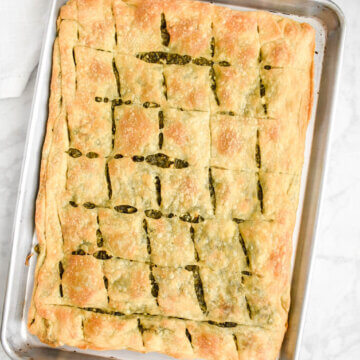
Hortopita is a traditional Greek filo pie that is stuffed with a variety of leafy greens and fresh herbs. This savory pie is made with a homemade, crispy filo and it can be made with or without feta for a vegetarian or vegan dish that is sure to please!
Of all the Greek savoury pies, spanakopita is by far the most well known variety. Whether you are Greek or not, you have probably heard of it and likely tried it. While I love spanakopita, its the less popular pites that usually steal my heart. Prasopita (Greek Leek Pie), Kolokithopita (Greek Zucchini Pie) and Tiropita (cheese pie) are definitely some of my favourite savoury pites! But of all the savoury filo pies, hortopita has to be the one I have eaten the most of in my life.

What is hortopita?
Hortopita is a savoury Greek pie made with filo and a filling comprised of green leafy vegetables, fresh herbs and feta (though you can leave out the feta for a vegan recipe). It can be made using a variety of leafy greens including spinach, Swiss chard, curly endive (andithia) as well as other greens. Essentially, it is a spanakopita that has replaced some of the spinach with other leafy greens.
My mom has made this delicious pita for me as long as I can remember and I have devoured more slices in one sitting than I care to admit. It is impossible to stop at one!
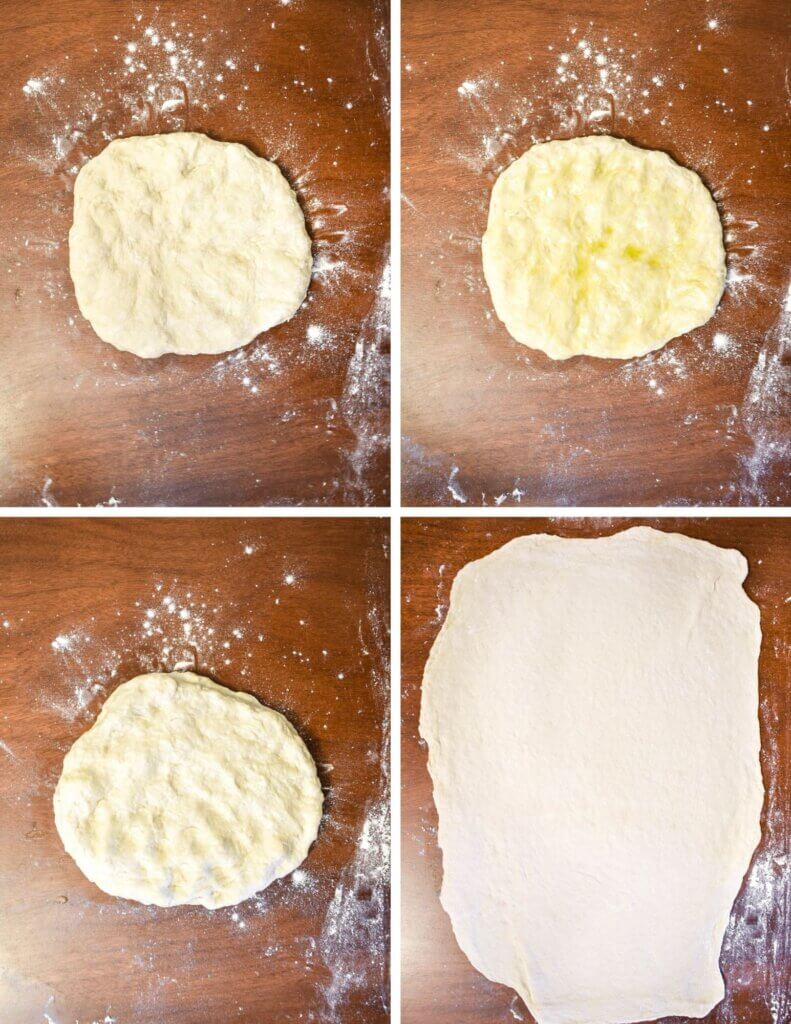
This hortopita is made with homemade filo dough which is thicker than the store-bought varieties. I have included step by step photos to show you how I make this hortopita so you can make it the authentic way too.
Let’s get cooking!

What ingredients do you need for the Hortopita filling?
- Leafy greens: spinach, Swiss chard, curly endive (andithia) [other options include romaine lettuce, kale]
- Herbs: parsley & dill
- Seasoning: cinnamon & pepper. Cinnamon isn’t typical in many hortopita recipes but its the way my mom has always made it. Absolutely delicious!
- Cheese: Feta & ricotta cheese [Omit to make this a vegan & nistisimo-friendly recipe. Note: if you omit the feta, season the greens with salt.]
- Olive oil: Good quality olive oil.
Ingredients in Homemade Filo Dough
- Flour
- Salt
- White wine vinegar (or white vinegar)
- Water
- Olive oil
Please note: For ingredient quantities and full instructions, go to the recipe card at the end of the post.

How to make Hortopita
While this recipe is easy to do once you’ve made it once before, I made sure to include lots of instructions and photos to help you whip this up. Don’t be scared off by the length of the instructions- I just wanted to make it easy for you and take out the guess work. Essentially this recipe comes down to 3 easy steps:
- Make the hortopita filling.
- Make the filo dough.
- Assemble and bake.
Make the hortopita filling:
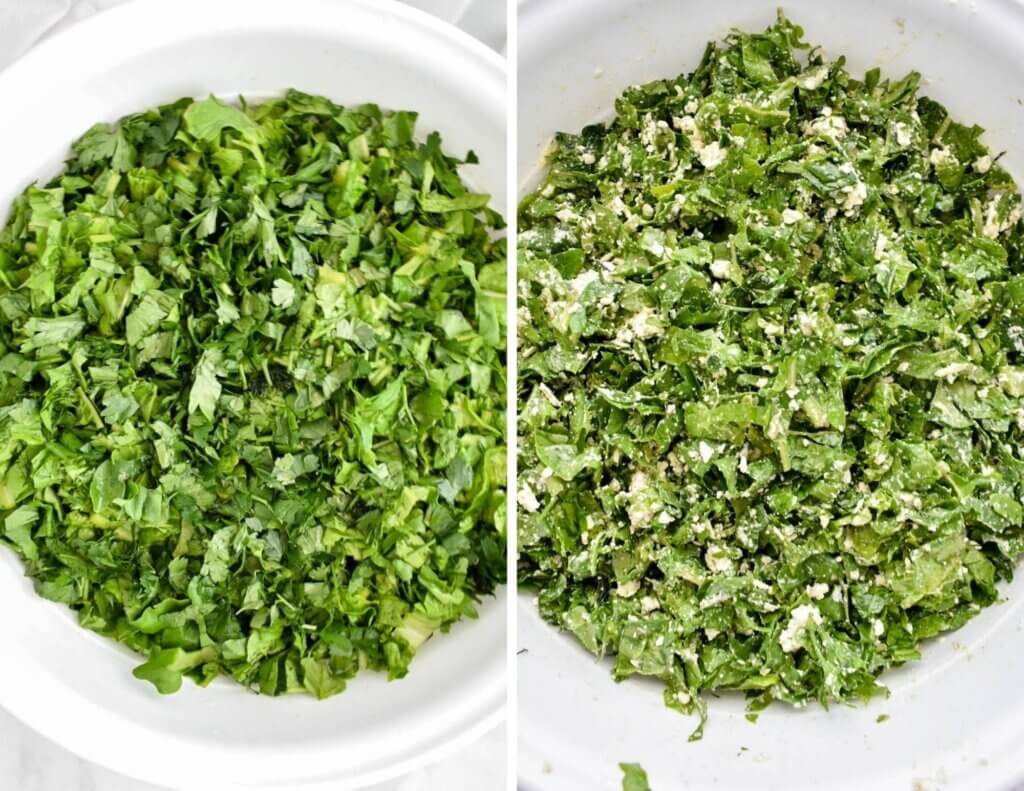
1. Chop all of the leafy green vegetables and place them in a large mixing bowl.
2. To the bowl, add the herbs, feta, ricotta, cinnamon, and pepper. Add olive oil and mix everything together and set aside.
Make the filo dough:
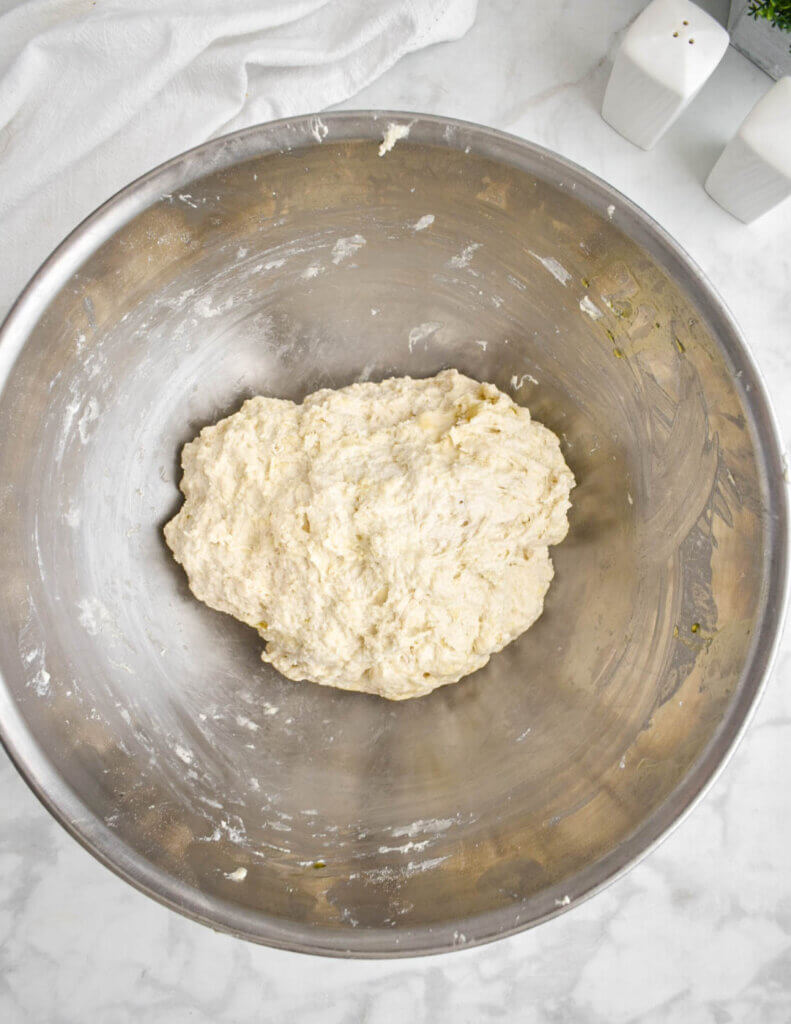
1. To a large bowl, add the flour, salt, vinegar, and water. Using your hands, mix to combine ingredients and then add the olive oil. Knead by hand until the dough comes together. It will look shaggy but pliable.
2. Divide the dough into 4 equal portions. On a clean, floured surface, form each dough portion into a flattened disk.
3. Take one disk and drizzle it with a teaspoon of olive oil and then add a second disk over top of it.
4. Using a rolling pin, roll the stacked filo disks out into a large rectangle (the size of a sheet pan). Sprinkle with more flour as needed to prevent it sticking to rolling pan or table.
5. Repeat this with the other 2 disks so that you end up with 2 large rectangular filo sheets.
Assemble and bake:
1. Grease a sheet pan with olive oil and then place one of the rectangular filo sheets onto it. If the filo overhangs a lot, trim those portions off. Top the filo sheet with the filling, spreading it out evenly. Then fold over any overhanging edges of filo on top of the filling.
2. Brush the edges of the filo with olive oil. Top the filling with the other filo sheet, trimming it if it is too large.

3. Brush olive oil over the filo and then gently score slices, but do not cut all the way through. (Think of it as if you are making dashed lines for each portion. After it is baked you will fully slice it but for now you are only scoring it. I use the tip of a knife and gently make small cuts to form the rough shape of each slice. Do not run your knife completely across the filo sheets to make full slices. If you run a knife through and completely cut each slice, the filo will begin to shrink into itself so avoid this.)

4. Bake in the oven for about an hour or until the filo is golden brown and crispy.

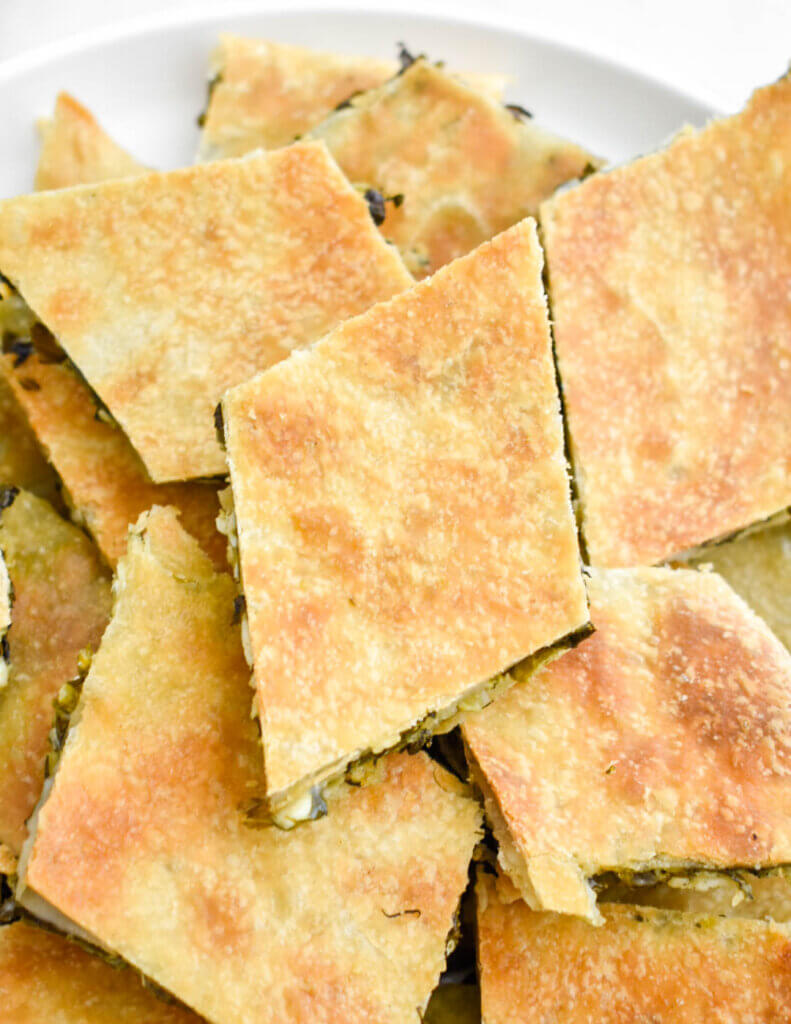
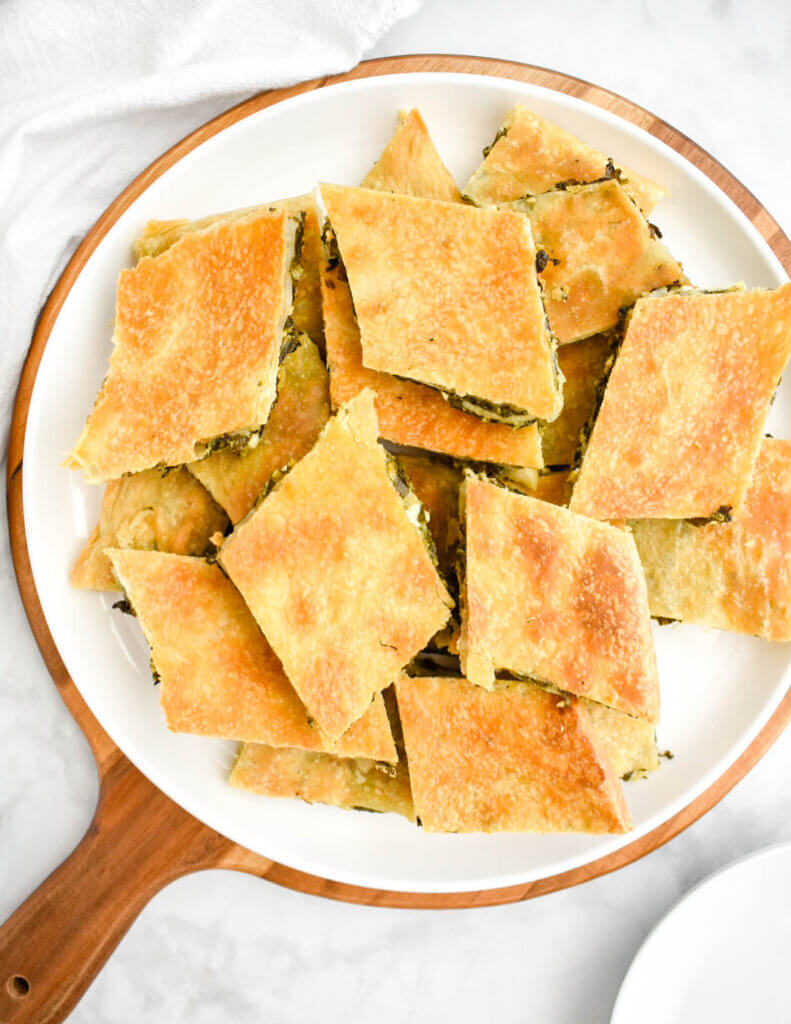
5. Remove from oven and let the pita cool for 5-10 minutes. Then transfer the pita to a cutting board and cut through all of the scored lines you made before baking. Place the slices onto a platter and serve warm or at room temperature.
What to serve with Hortopita
Hortopita is incredibly versatile and makes a great appetizer, snack, side dish or even lunch. I love to enjoy it with a good salad like a Traditional Greek Salad (my absolute favourite!), Mediterranean Couscous Salad, or my Radish Cucumber Salad!
It can be served or hot which makes it great for packing up in lunches or taking along with you to a picnic or potluck!
I hope you enjoy this recipe!
-Cathy
You may also like:
Prasopita (Greek Leek Pie)
Kolokithopita (Greek Zucchini Pie)
Spanakopita
Hortopita
Ingredients
For the filling:
- 2 bunches spinach
- 1 bunch Swiss chard
- 1 bunch curly endive (andithia)
- 1 bunch parsley
- 1/2 cup dill chopped
- 3 cups feta crumbled [omit for vegan recipe]
- 1 cup ricotta cheese [omit for vegan recipe]
- 1 tablespoon cinnamon
- 1/4 teaspoon pepper
- 1/2 cup olive oil
For the homemade filo:
- 6 cups flour (+ more for rolling out)
- 1 1/2 teaspoons salt
- 2 tablespoons white wine vinegar (or white vinegar)
- 2 1/2 cups water
- 2 tablespoons olive oil (+ more for drizzling between layers and to grease sheet pan)
Instructions
- Preheat oven to 375F.
Make the filling:
- Chop all of the leafy green vegetables and place them in a large mixing bowl. To the bowl, add the herbs, feta, ricotta, cinnamon, and pepper. Add olive oil and mix everything together and set aside.
Make the filo dough:
- To a large bowl, add the flour, salt, vinegar, and water. Using your hands, mix to combine ingredients and then add the olive oil. Knead by hand until the dough comes together. It will look shaggy but pliable.
- Divide the dough into 4 equal portions. On a clean, floured surface, form each dough portion into a flattened disk.
- Take one disk and drizzle it with a teaspoon of olive oil and then add a second disk over top of it. Using a rolling pin, roll the stacked filo disks out into a large rectangle (the size of a sheet pan). Sprinkle with more flour as needed to prevent it sticking to rolling pan or table.
- Repeat this with the other 2 disks so that you end up with 2 large rectangular filo sheets.
Assemble the hortopita
- Grease a sheet pan with olive oil and then place one of the rectangular filo sheets onto it. If the filo overhangs a lot, trim those portions off. Top the filo sheet with the filling, spreading it out evenly. Then fold over any overhanging edges of filo on top of the filling.
- Brush the edges of the filo with olive oil. Top the filling with the other filo sheet, trimming it if it is too large.
- Brush olive oil over the filo and then gently score slices, but do not cut all the way through. (Think of it as if you are making dashed lines for each portion. After it is baked you will fully slice it but for now you are only scoring it. I use the tip of a knife and gently make small cuts to form the rough shape of each slice. Do not run your knife completely across the filo sheets to make full slices. If you run a knife through and completely cut each slice, the filo will begin to shrink into itself so avoid this.)
- Bake in the oven for about an hour or until the filo is golden brown and crispy.
- Remove from oven and let the pita cool for 5-10 minutes. Then transfer the pita to a cutting board and cut through all of the scored lines you made before baking. Place the slices onto a platter and serve warm or at room temperature.
Note: Metric ingredient measurements are provided as a courtesy using a third-party calculator and are rounded to the nearest unit. The recipes provided on this site have not been tested with metric measurements and their accuracy cannot be verified.
Nutrition
The nutritional information provided is based on third-party calculations and is an estimate only. Accurate nutritional facts will vary based on the particular brands used, portion sizes, measurement accuracy and more.

